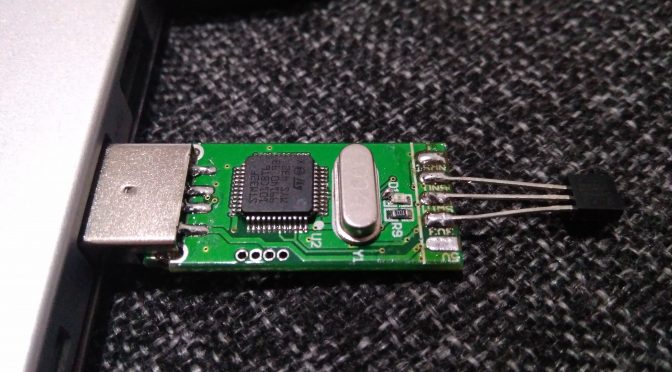
Last time I played with this device, I only uploaded gnuk token software and it was done. This time I wanted to try some developement in Arduino framework.
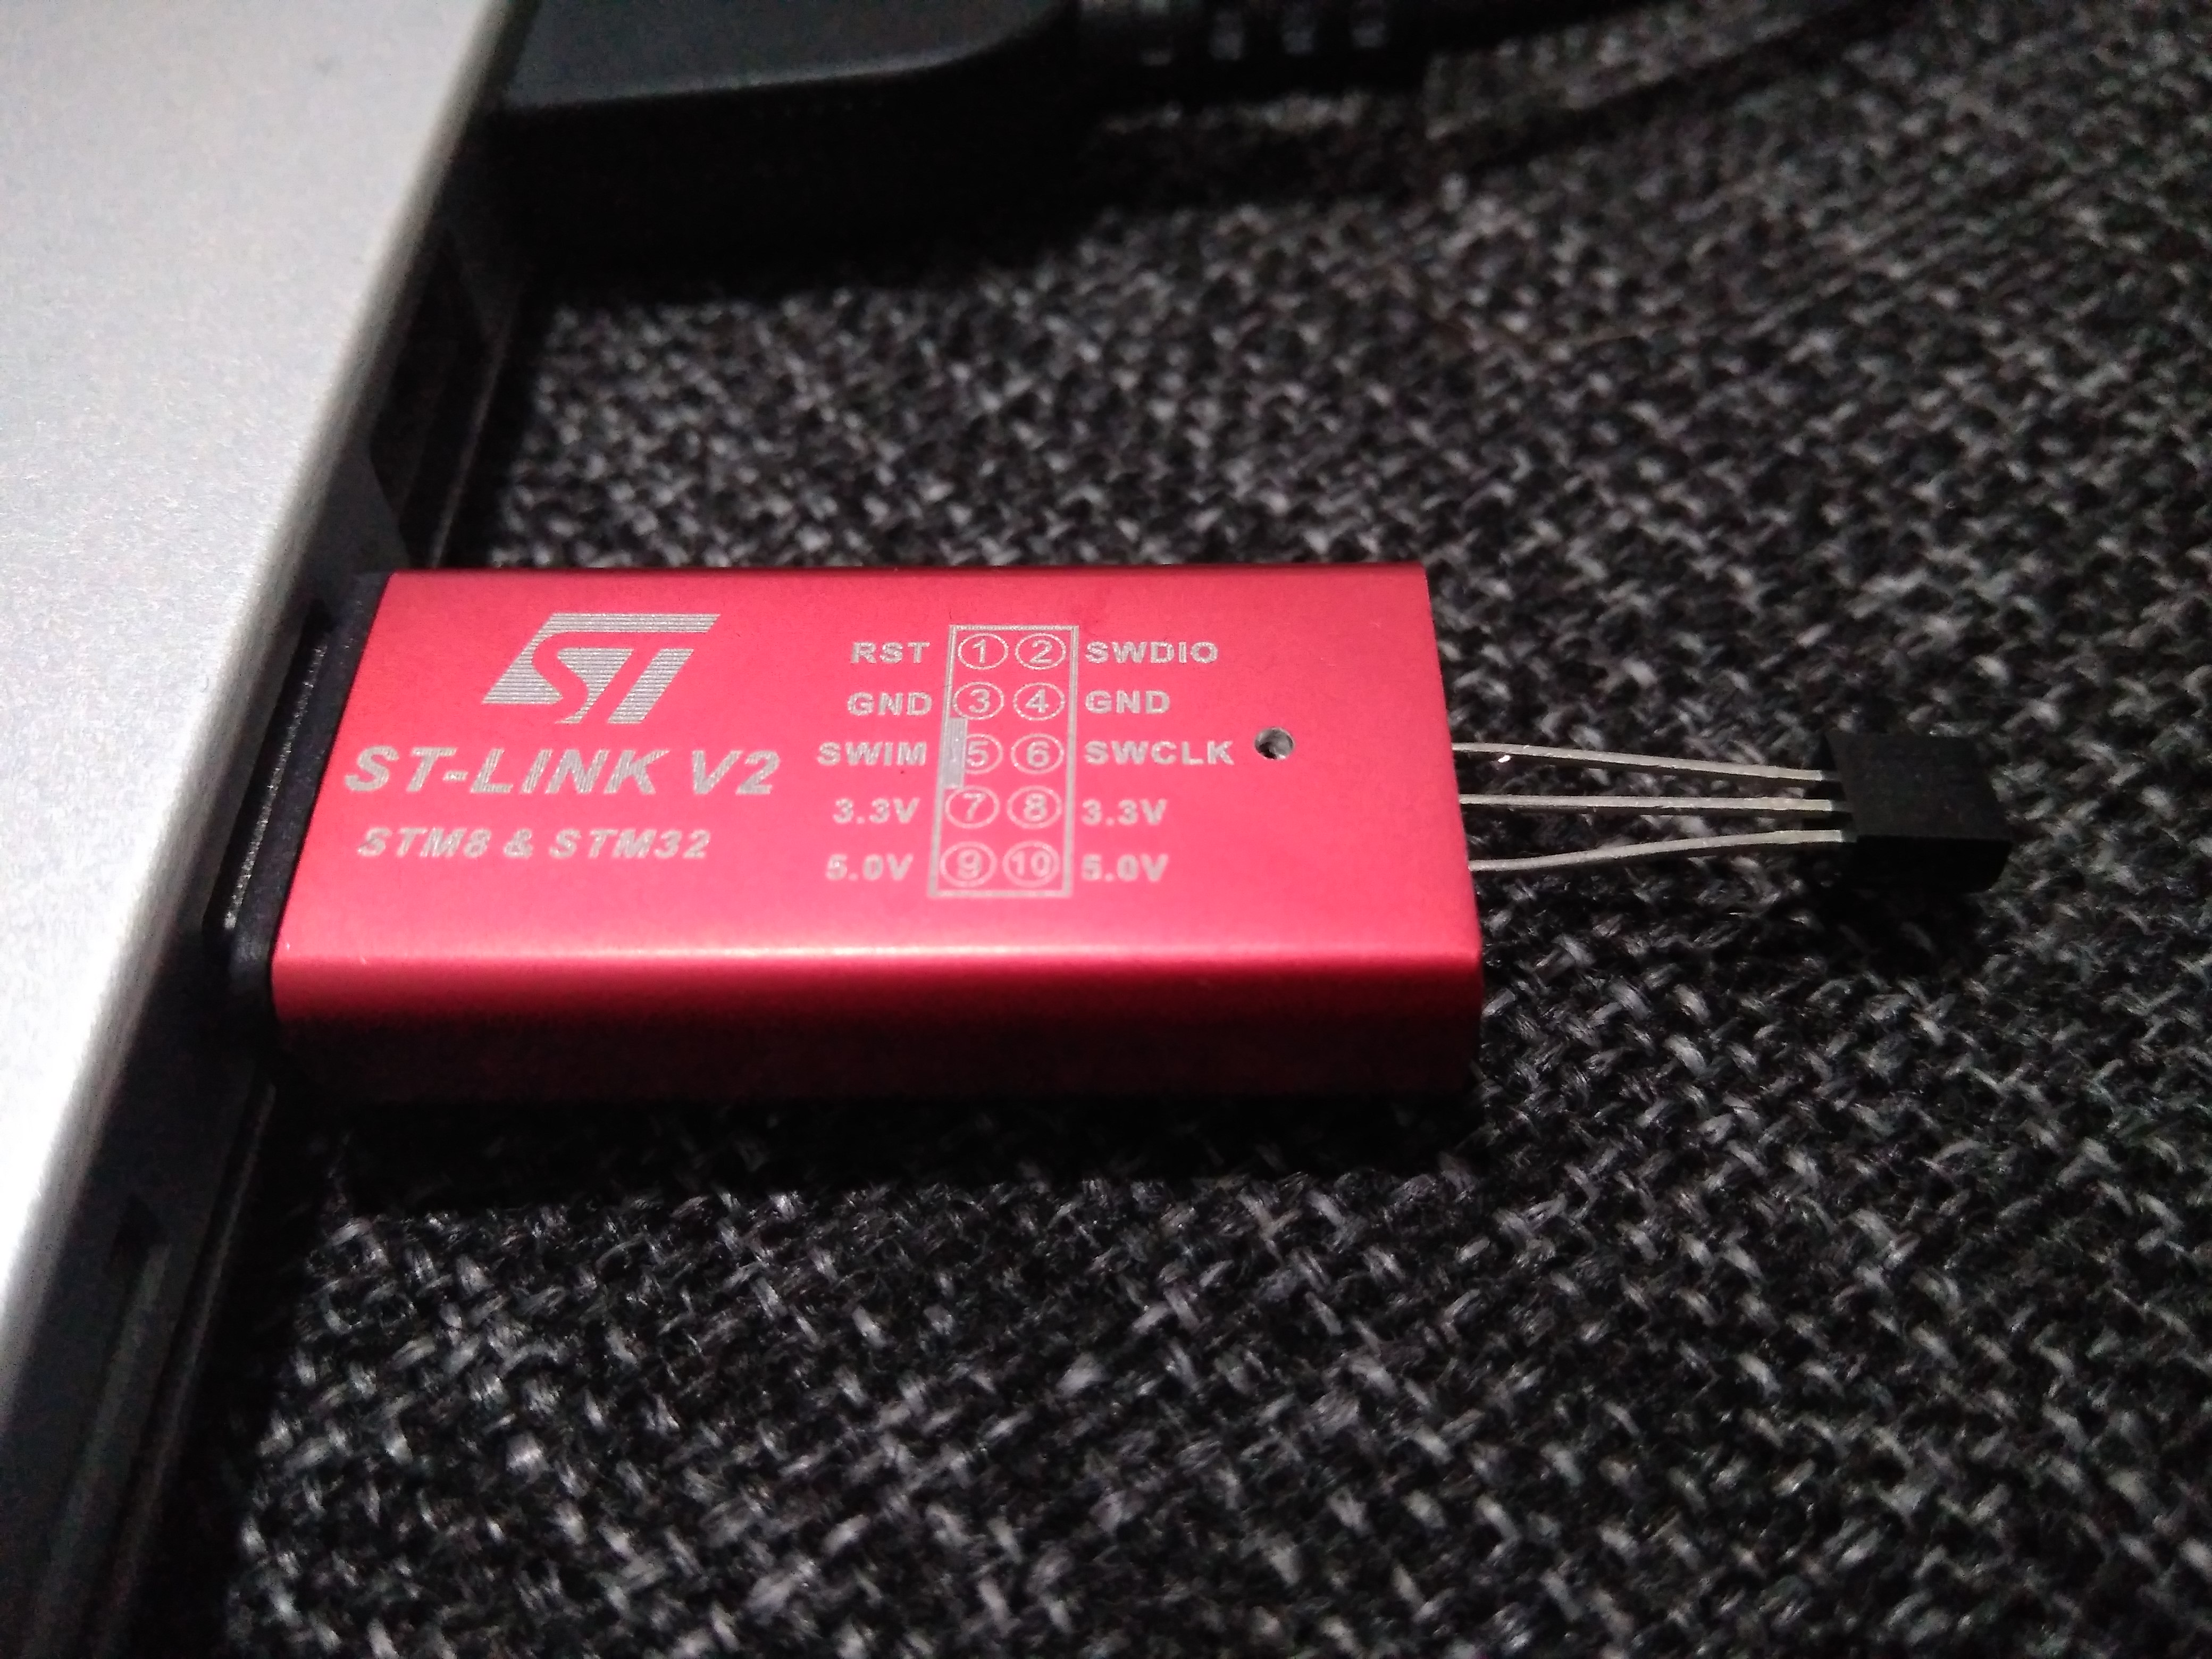
To make it work with Arduino, you need to upload customized bootloader by Roger Clark. I chose the one with LED on pin PA9 and loaded it with another st-link using openocd:

stm32f103.cfg:
#daemon configuration
telnet_port 4444
gdb_port 3333

source [find interface/stlink-v2.cfg]
source [find target/stm32f1x.cfg]

# The chip has 64KB sram
set WORKAREASIZE 0x10000

gdb_breakpoint_override hard
$ telnet localhost 4444
Trying 127.0.0.1...
Connected to localhost.
Escape character is '^]'.
Open On-Chip Debugger
> reset halt
target halted due to debug-request, current mode: Thread
xPSR: 0x01000000 pc: 0x08002764 msp: 0x20000800
> stm32f1x unlock 0
Device Security Bit Set
target halted due to breakpoint, current mode: Thread
xPSR: 0x61000000 pc: 0x2000003a msp: 0x20000800
stm32x unlocked.
INFO: a reset or power cycle is required for the new settings to take effect.
> reset halt
target halted due to debug-request, current mode: Thread
xPSR: 0x01000000 pc: 0xfffffffe msp: 0xfffffffc
> flash banks
#0 : stm32f1x.flash (stm32f1x) at 0x08000000, size 0x00010000, buswidth 0, chipwidth 0
> stm32f1x mass_erase 0
stm32x mass erase complete
> flash write_bank 0 generic_boot20_pa9.bin 0
target halted due to breakpoint, current mode: Thread
xPSR: 0x61000000 pc: 0x2000003a msp: 0xfffffffc
wrote 21140 bytes from file generic_boot20_pa9.bin to flash bank 0 at offset 0x00000000 in 0.689790s (29.929 KiB/s)
> reset
This was easy. Then I connected to newly appeared serial port and it was showing following message in loop:
Congratulations, you have installed the STM32duino bootloader
See https://github.com/rogerclarkmelbourne/STM32duino-bootloader


For more information about Arduino on STM32
and http://www.stm32duino.com
So it worked, at least somehow…
Then I wrote a simple LED blink program using PlatformIO and ststm32 module. But when I tried to upload it, it was not working. So I opened an issue here to get some help but none of the advices worked so I tried to debug it myself.
The upload script sends special sequence to tell the bootloader to restart the device. The bootloader pulls USB D+ pin low for some time and then returns it back to USB interface. This should trigger re-enumeration in USB host (PC) and boot into DFU mode. DFU is active for a few seconds after start and then starts our main program. But this was not happening, the device didn’t reboot. I even tried to add 1k5 resistor from USB D+ to VCC but without success.
So I changed the upload script so it shows message and waits for any device in DFU mode (for details see my pull request).
After this, when I saw the message, I unplugged and plugged back in my board, it got detected, firmware was uploaded and program was running. Finally!
Thermometer
To build something useful, I decided to use DHT11 sensor I had on hand. This was only matter of finding the right Arduino library and setting right input pin. You can see the project here:
https://github.com/danielkucera/st-link-dht11
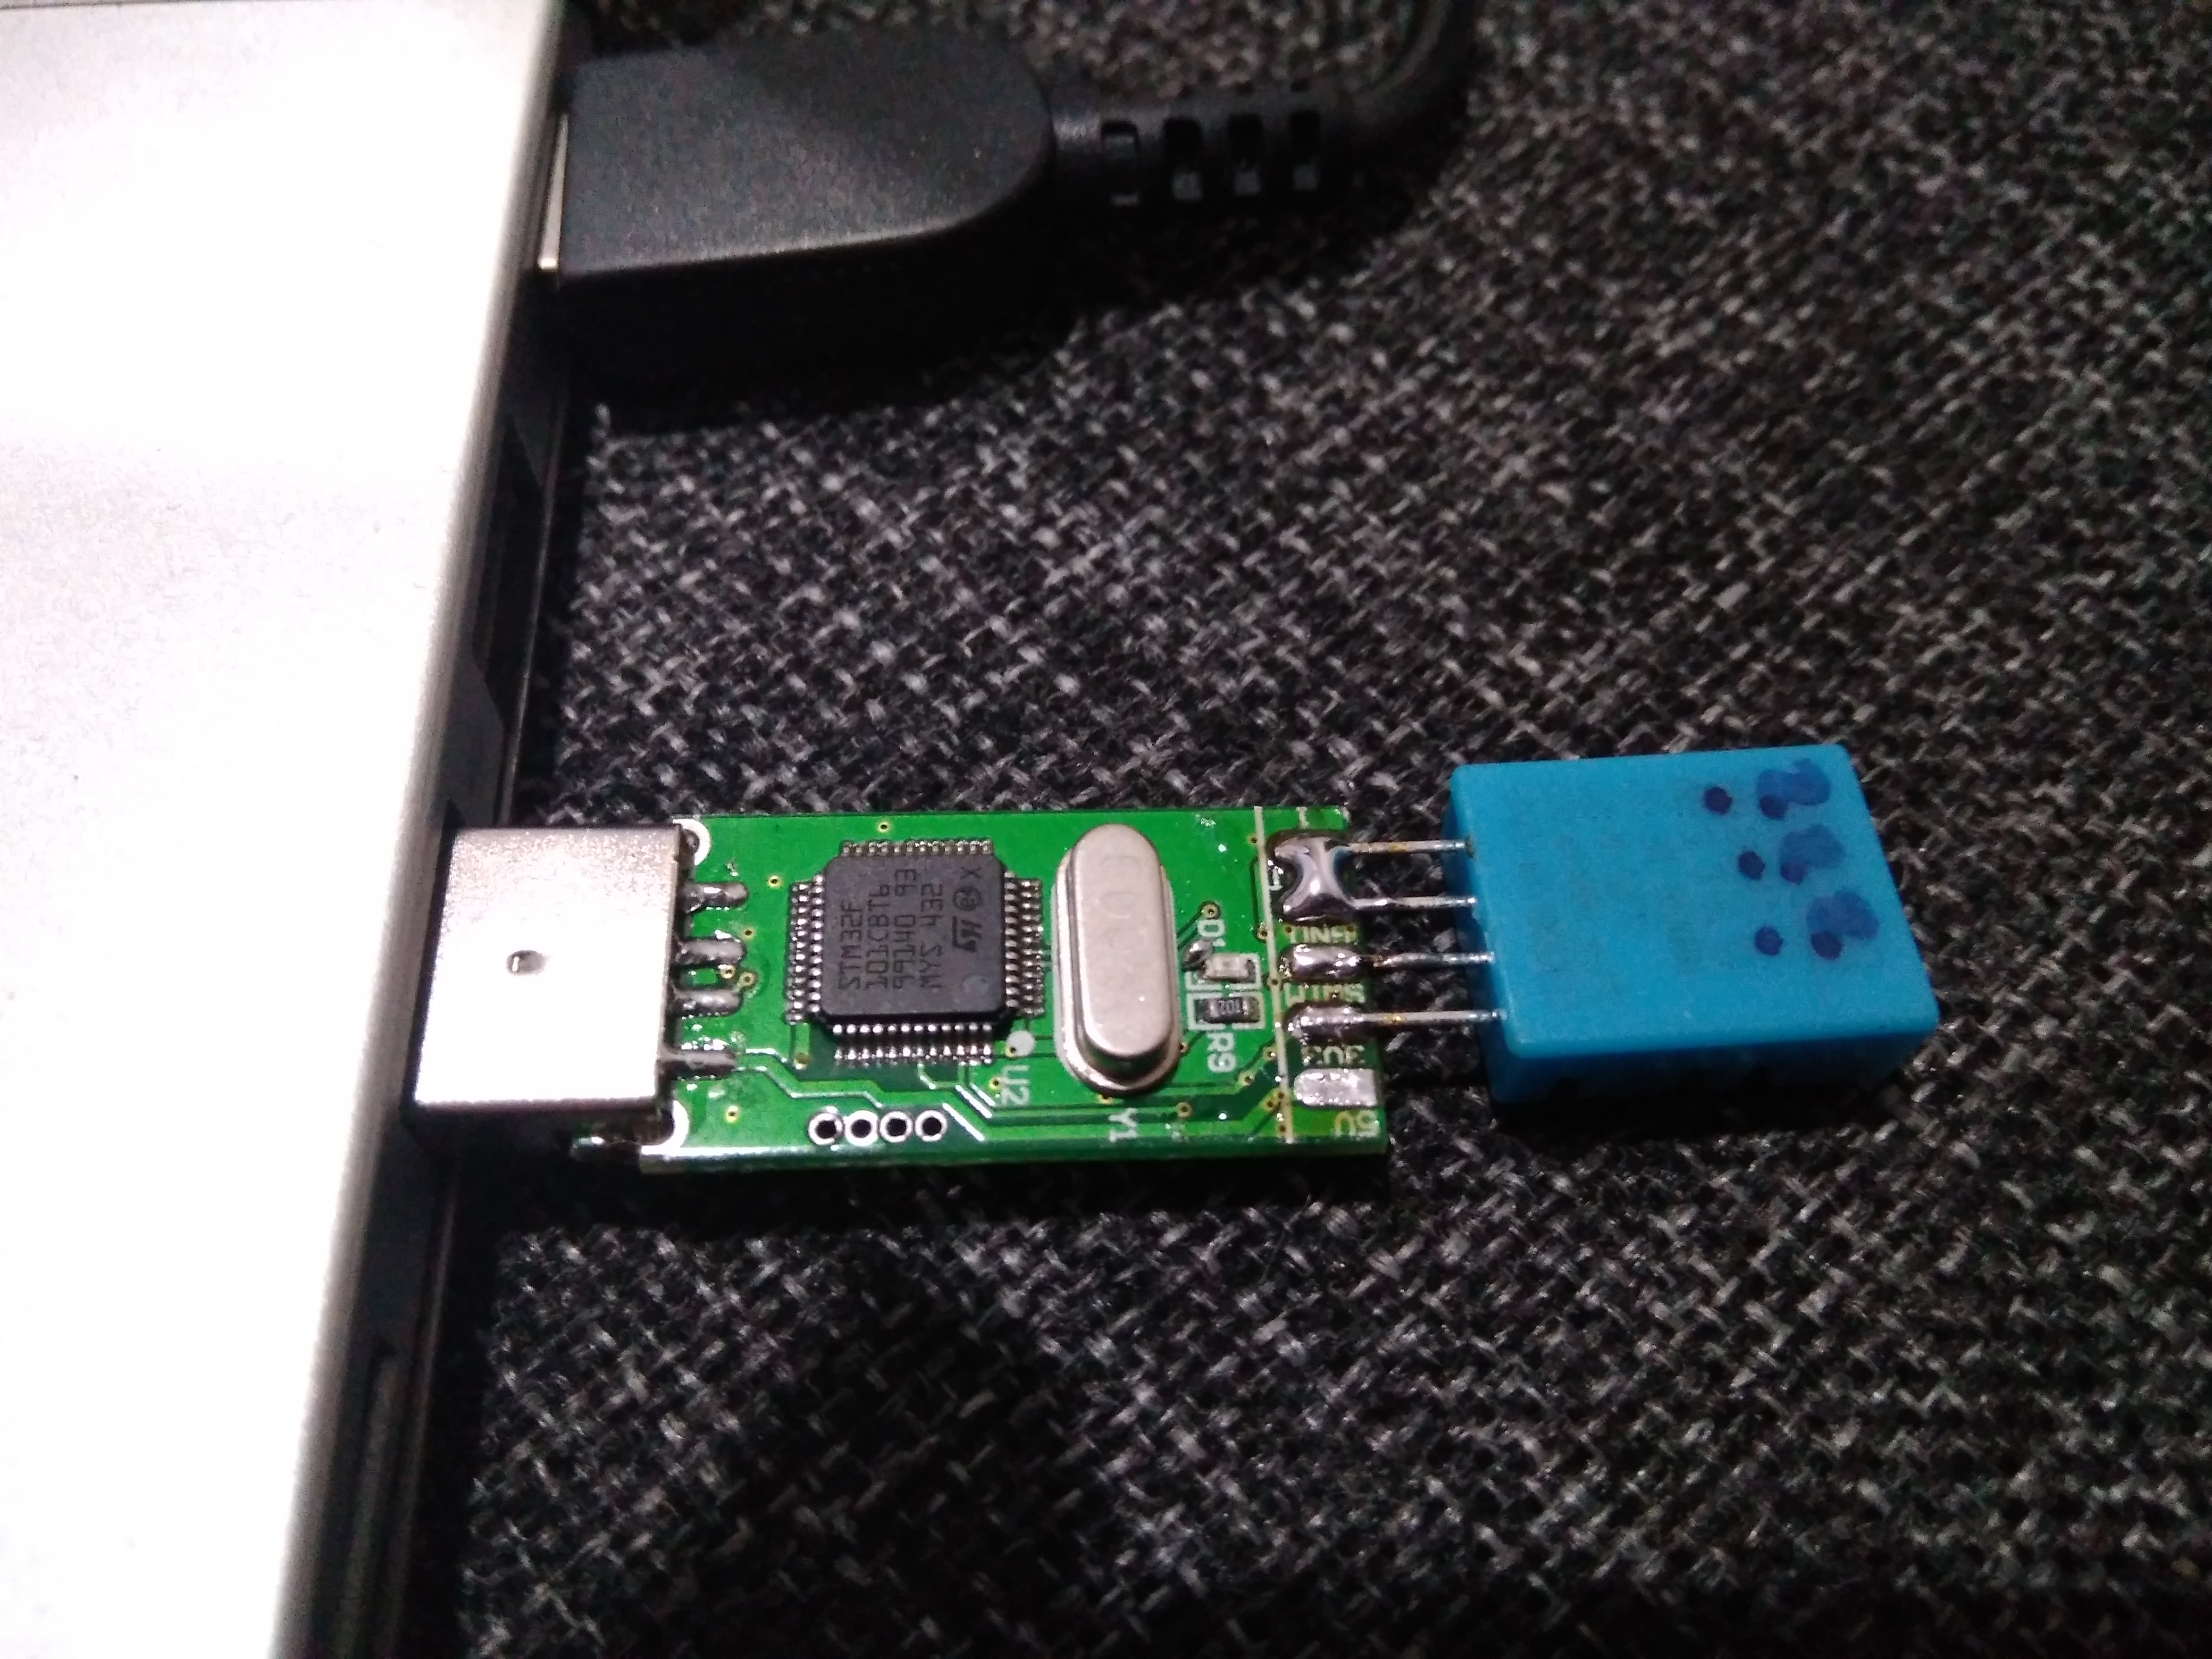
This is how I connected the sensor:
After a while I’ve got a working thermometer sending data over virtual serial port:
~$ sudo cat /dev/ttyACM0
Humidity: 38.00 % Temperature: 24.00 *C 75.20 *F Heat index: 23.45 *C 74.21 *F
Humidity: 38.00 % Temperature: 24.00 *C 75.20 *F Heat index: 23.45 *C 74.21 *F
Humidity: 38.00 % Temperature: 24.00 *C 75.20 *F Heat index: 23.45 *C 74.21 *F
Humidity: 38.00 % Temperature: 24.00 *C 75.20 *F Heat index: 23.45 *C 74.21 *F
But it was very inaccurate (at least it seemed so). Then I remembered I also got another type of sensor: DS18B20.
Connecting it was easy again: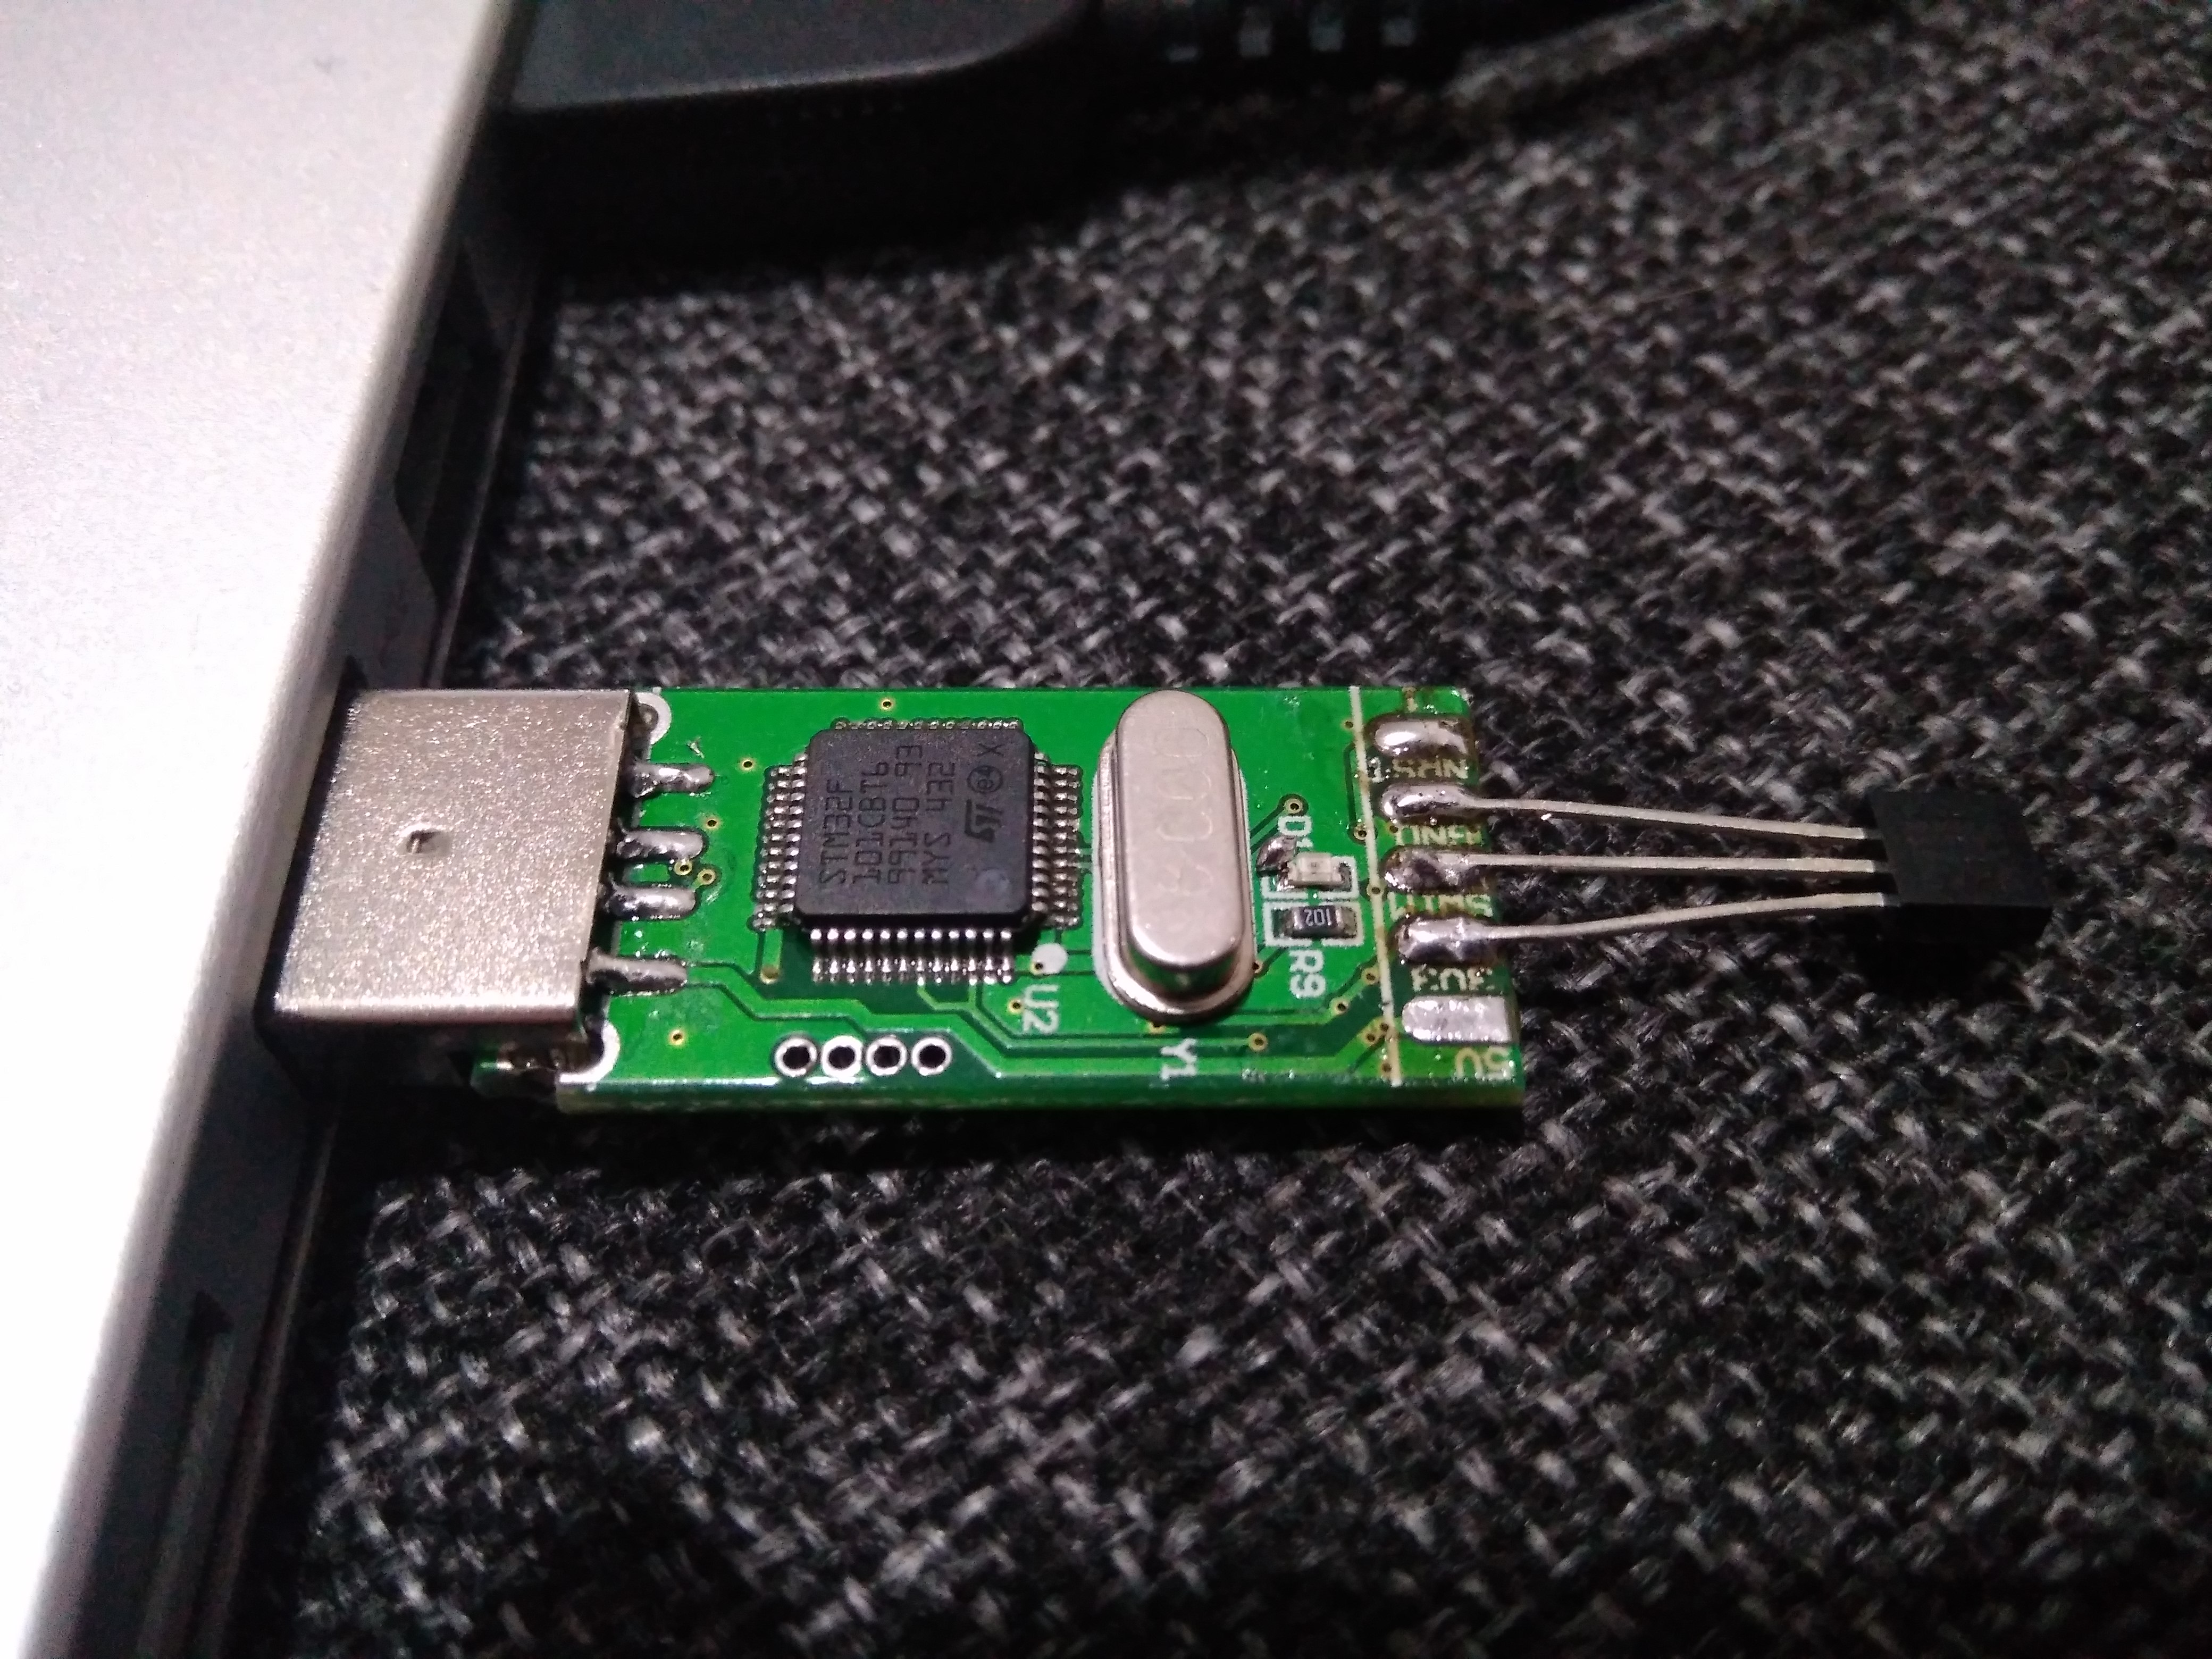
Then I looked for an Arduino library again, modified sample code and the result is here:
https://github.com/danielkucera/st-link-DS18B20
It looked much better (in terms of precision):
~$ sudo cat /dev/ttyACM0
25.31
25.31
25.31
25.31
25.31
25.25
And it also looks good assembled which is the main reason for preferring this board over some generic STM32 dev board.
I can imagine this board can be used for processing and sending some data to PC where you need exact timing or bit banging with external device. I tested maximum achieved transfer rate and it was about 600kB/s which is not bad.
I have one or two more ideas how to use this board so be prepared for the next blog 🙂
One thought on “ST-Link clone as STM32 dev board”