This project took me a year to finish but finally it’s done. What I wanted is to build an automatic IoT sprinkler controller from cheap parts. This is my story.
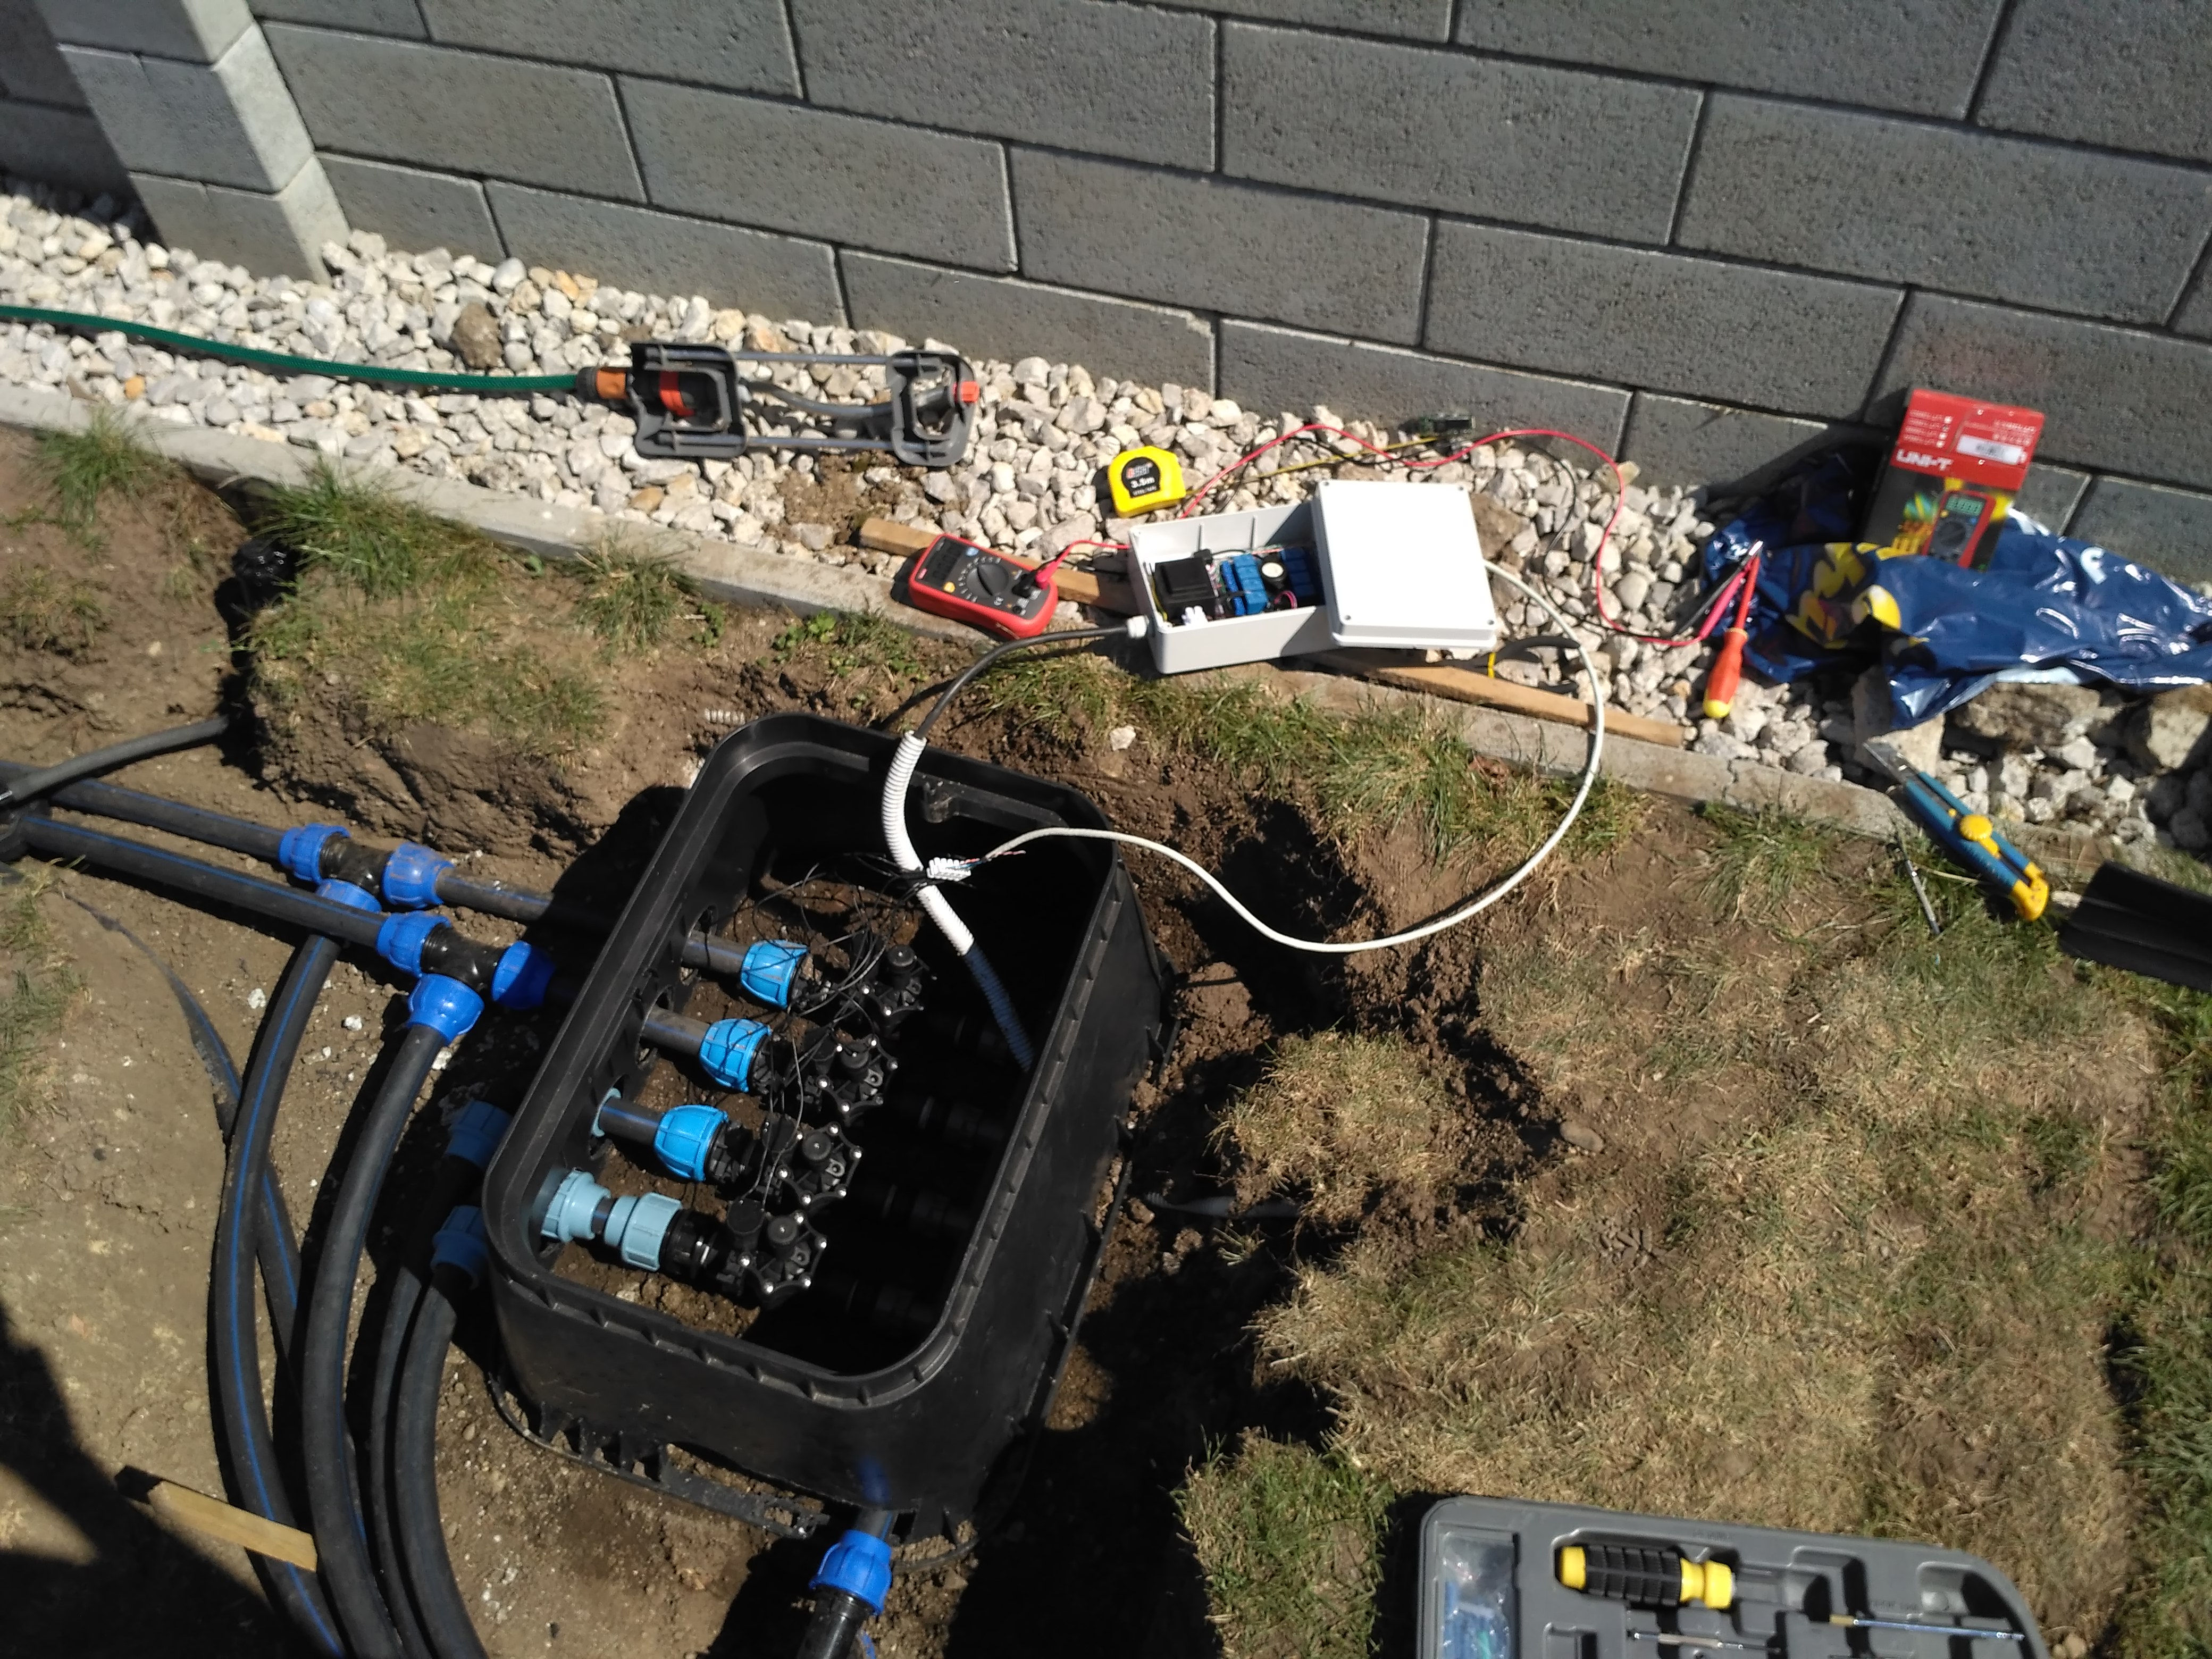
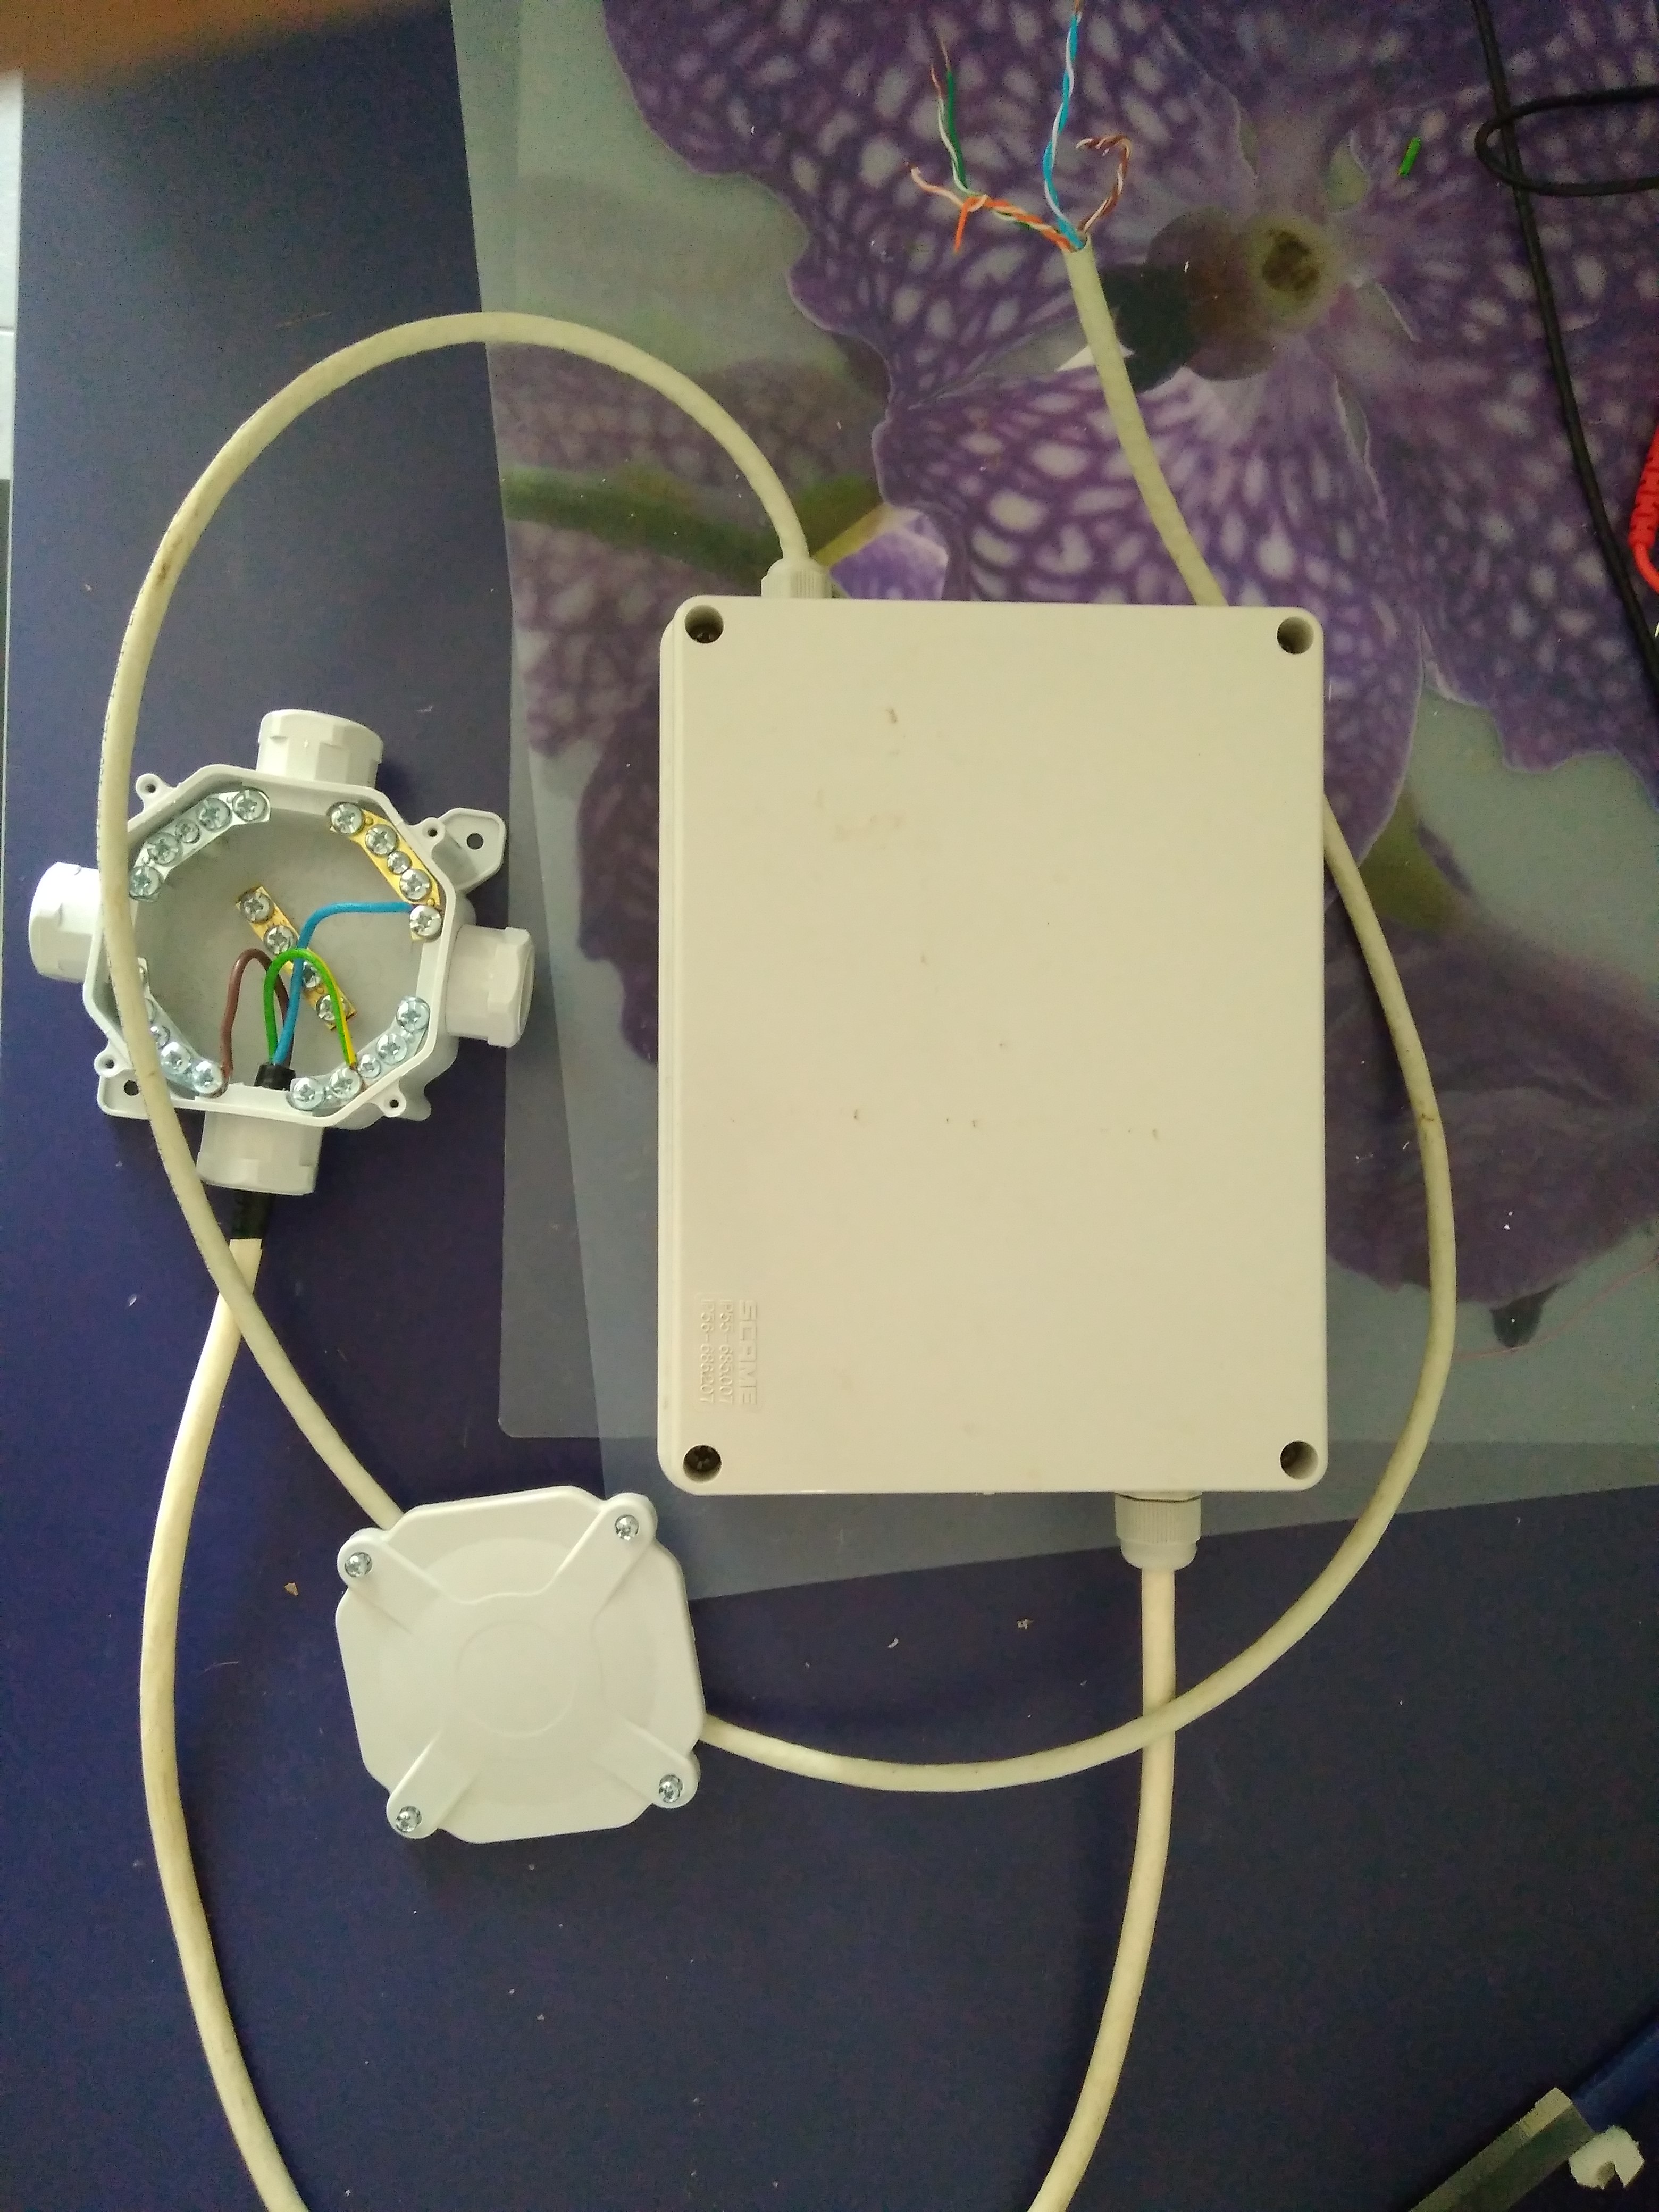
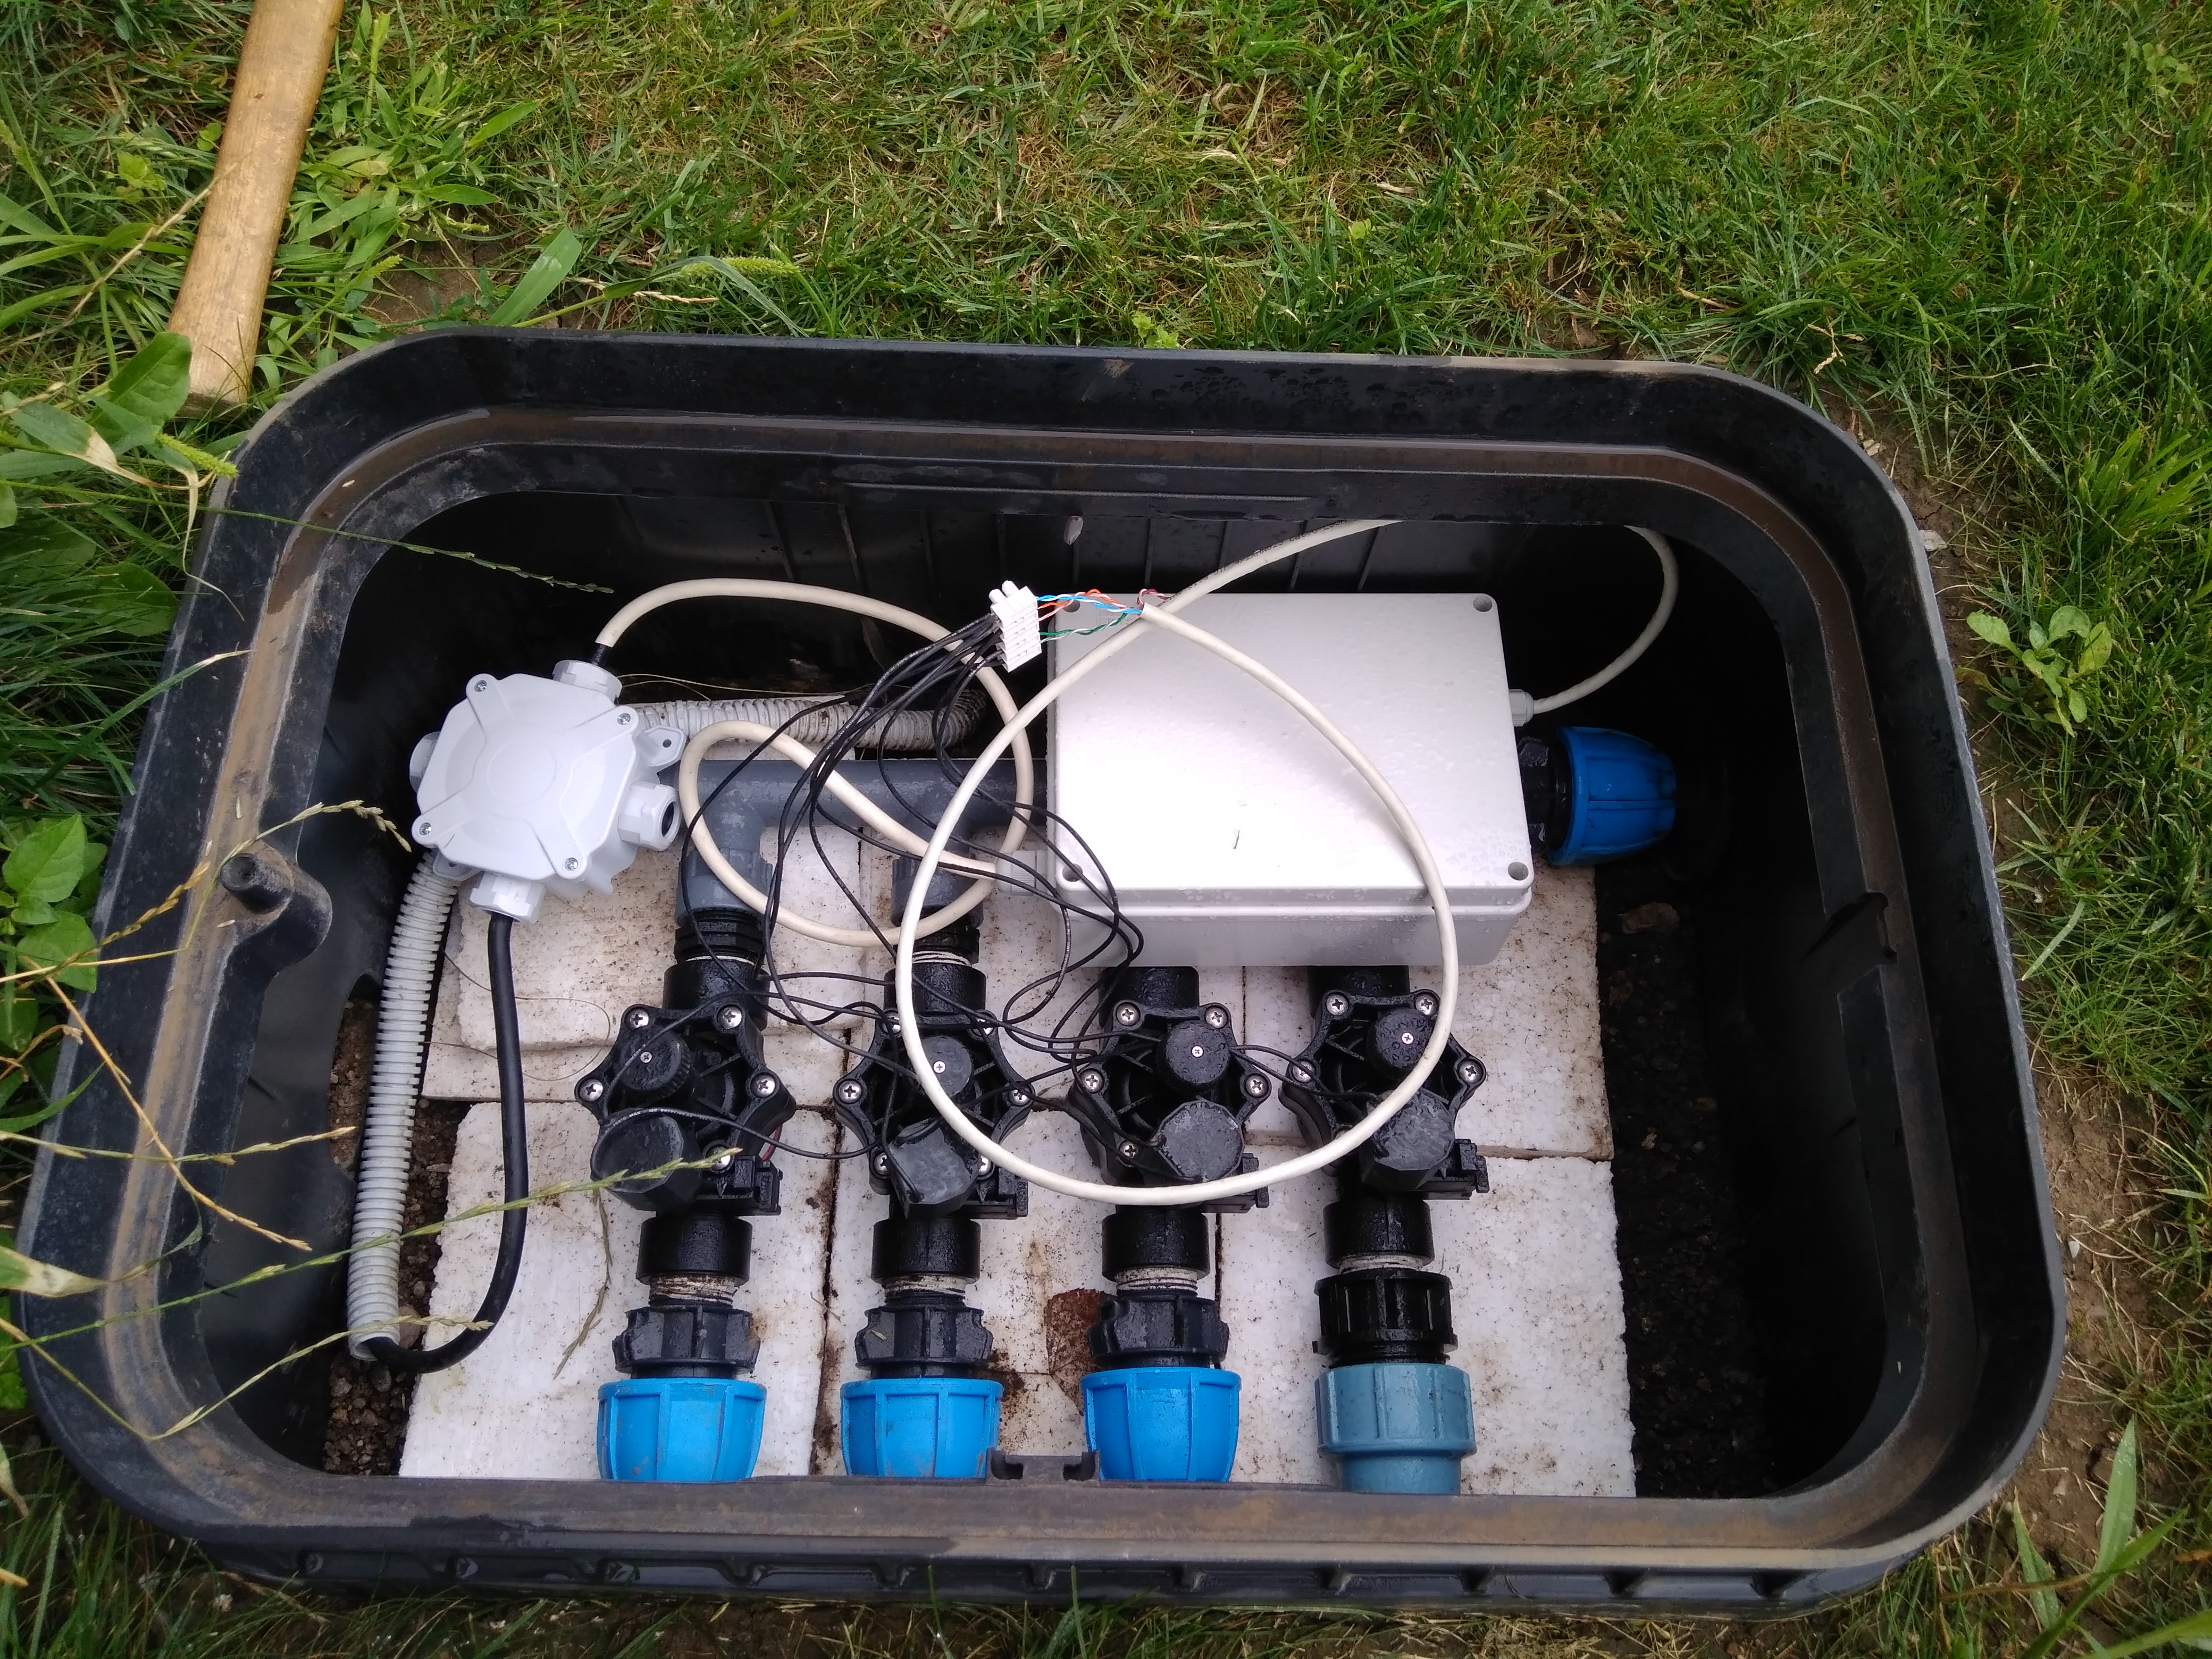
At the beginning all pipes and sprinklers were installed by an amateur plumber – my dad 🙂 My task was to create a system to control electromagnetic valves in this valve box:
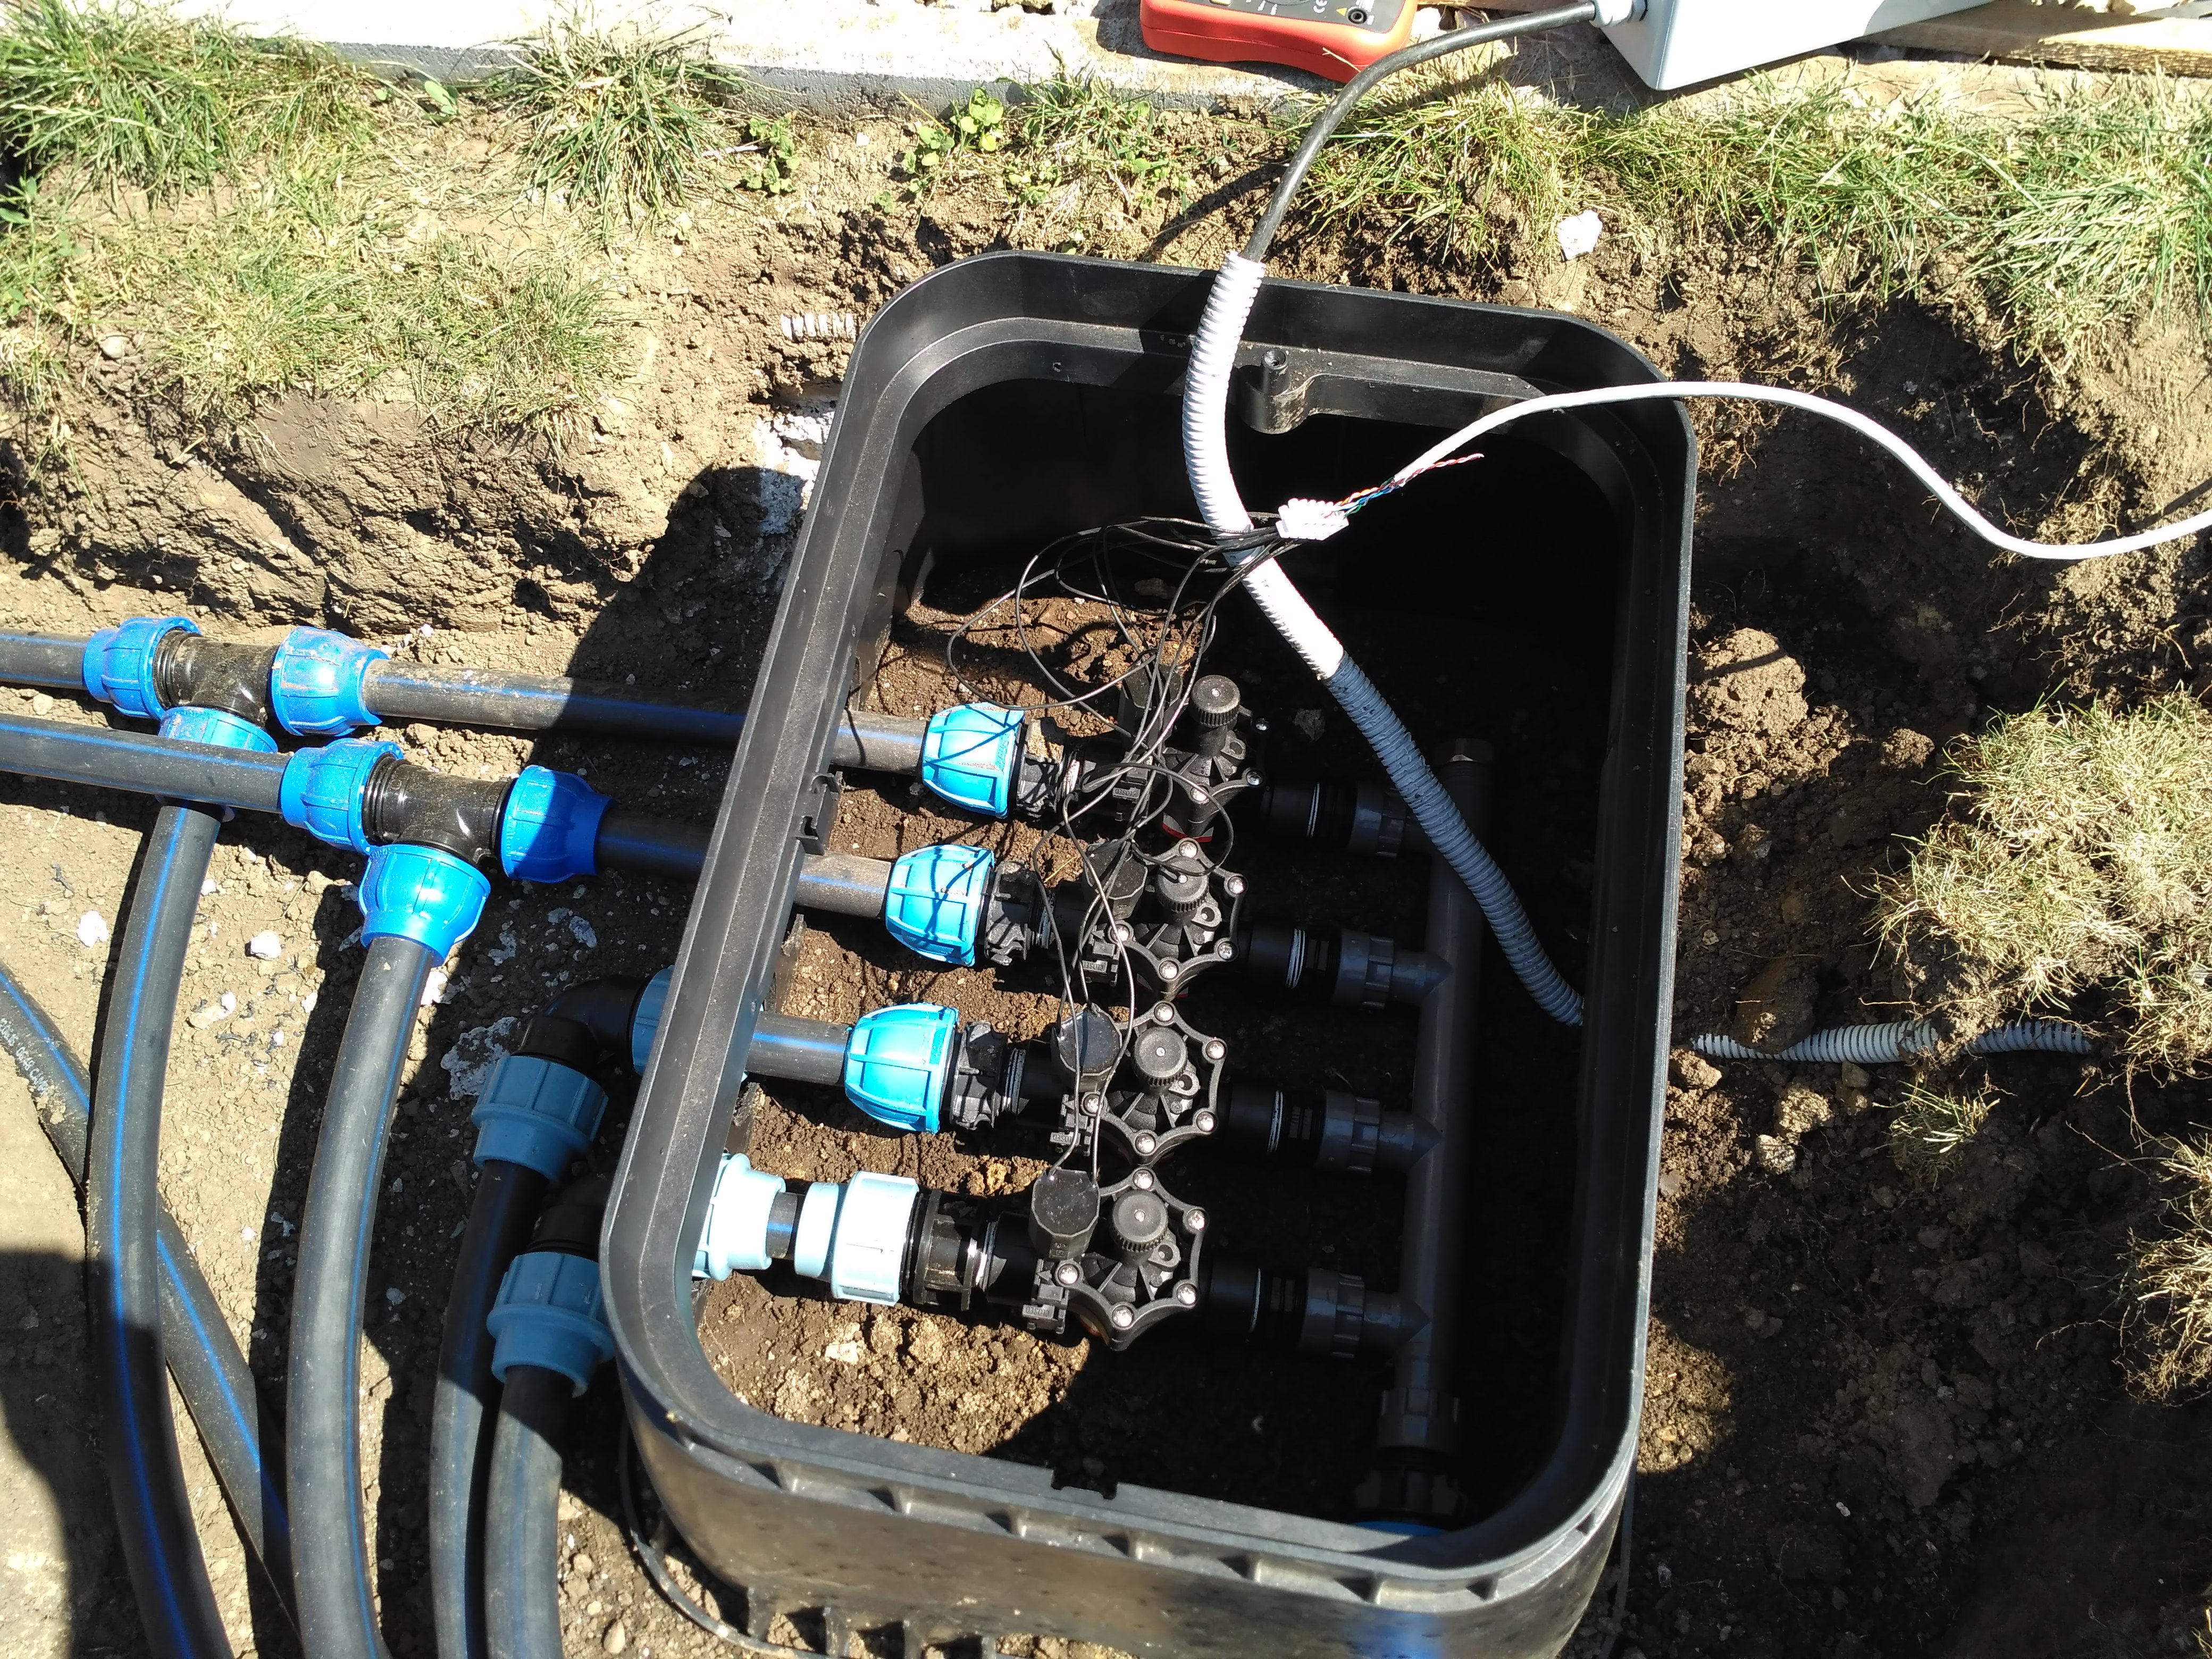 He created 4 sections so I needed to control four 12V AC valves. Moreover there was no data cable (only one for power) in the valve box, so I needed to do it wirelessly.
I decided to split the system into two parts:
- central unit with web UI – running on public server
- wireless valve controller with relays
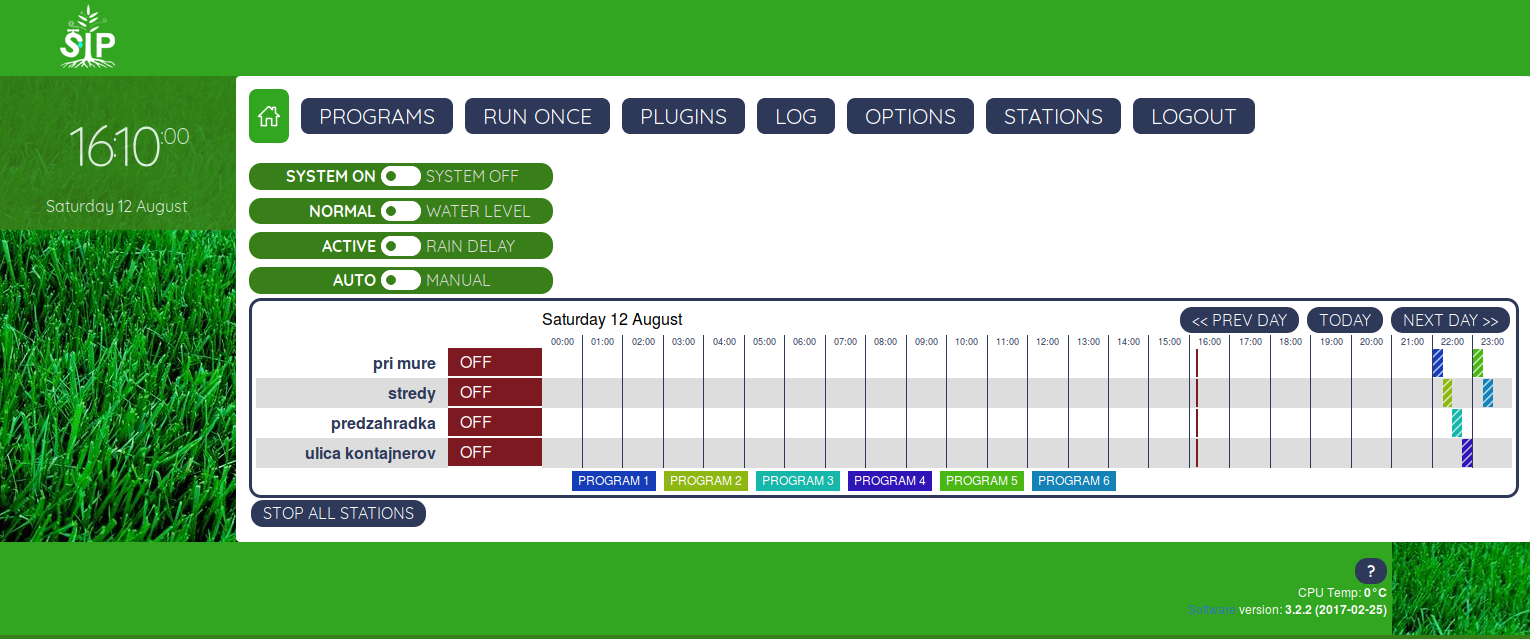
Web UI
I wasn’t going to reinvent the wheel with web UI so I searched the net for some opensource solutions. The one which interrested me most was SIP. It is python based sprinkler scheduler with nice web UI and many neat features (online weather query for rain delay, plugin support, responsive design,…)
 It is designed to control Raspberry Pi GPIO but I wasn’t going to use it that way. Instead I wrote a plugin which listens on TCP port (20000) for connections and sends updated relay status to all clients on change. It runs on my server as python daemon and serves the GUI.
This was the easy part.
Relay controller – first try
My original intention was to use cheap OpenWRT router and USB relay.
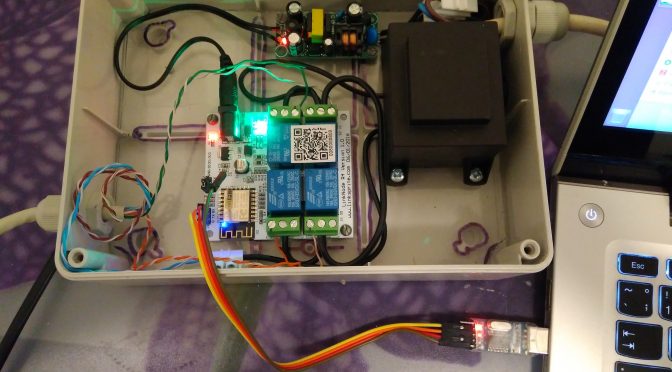
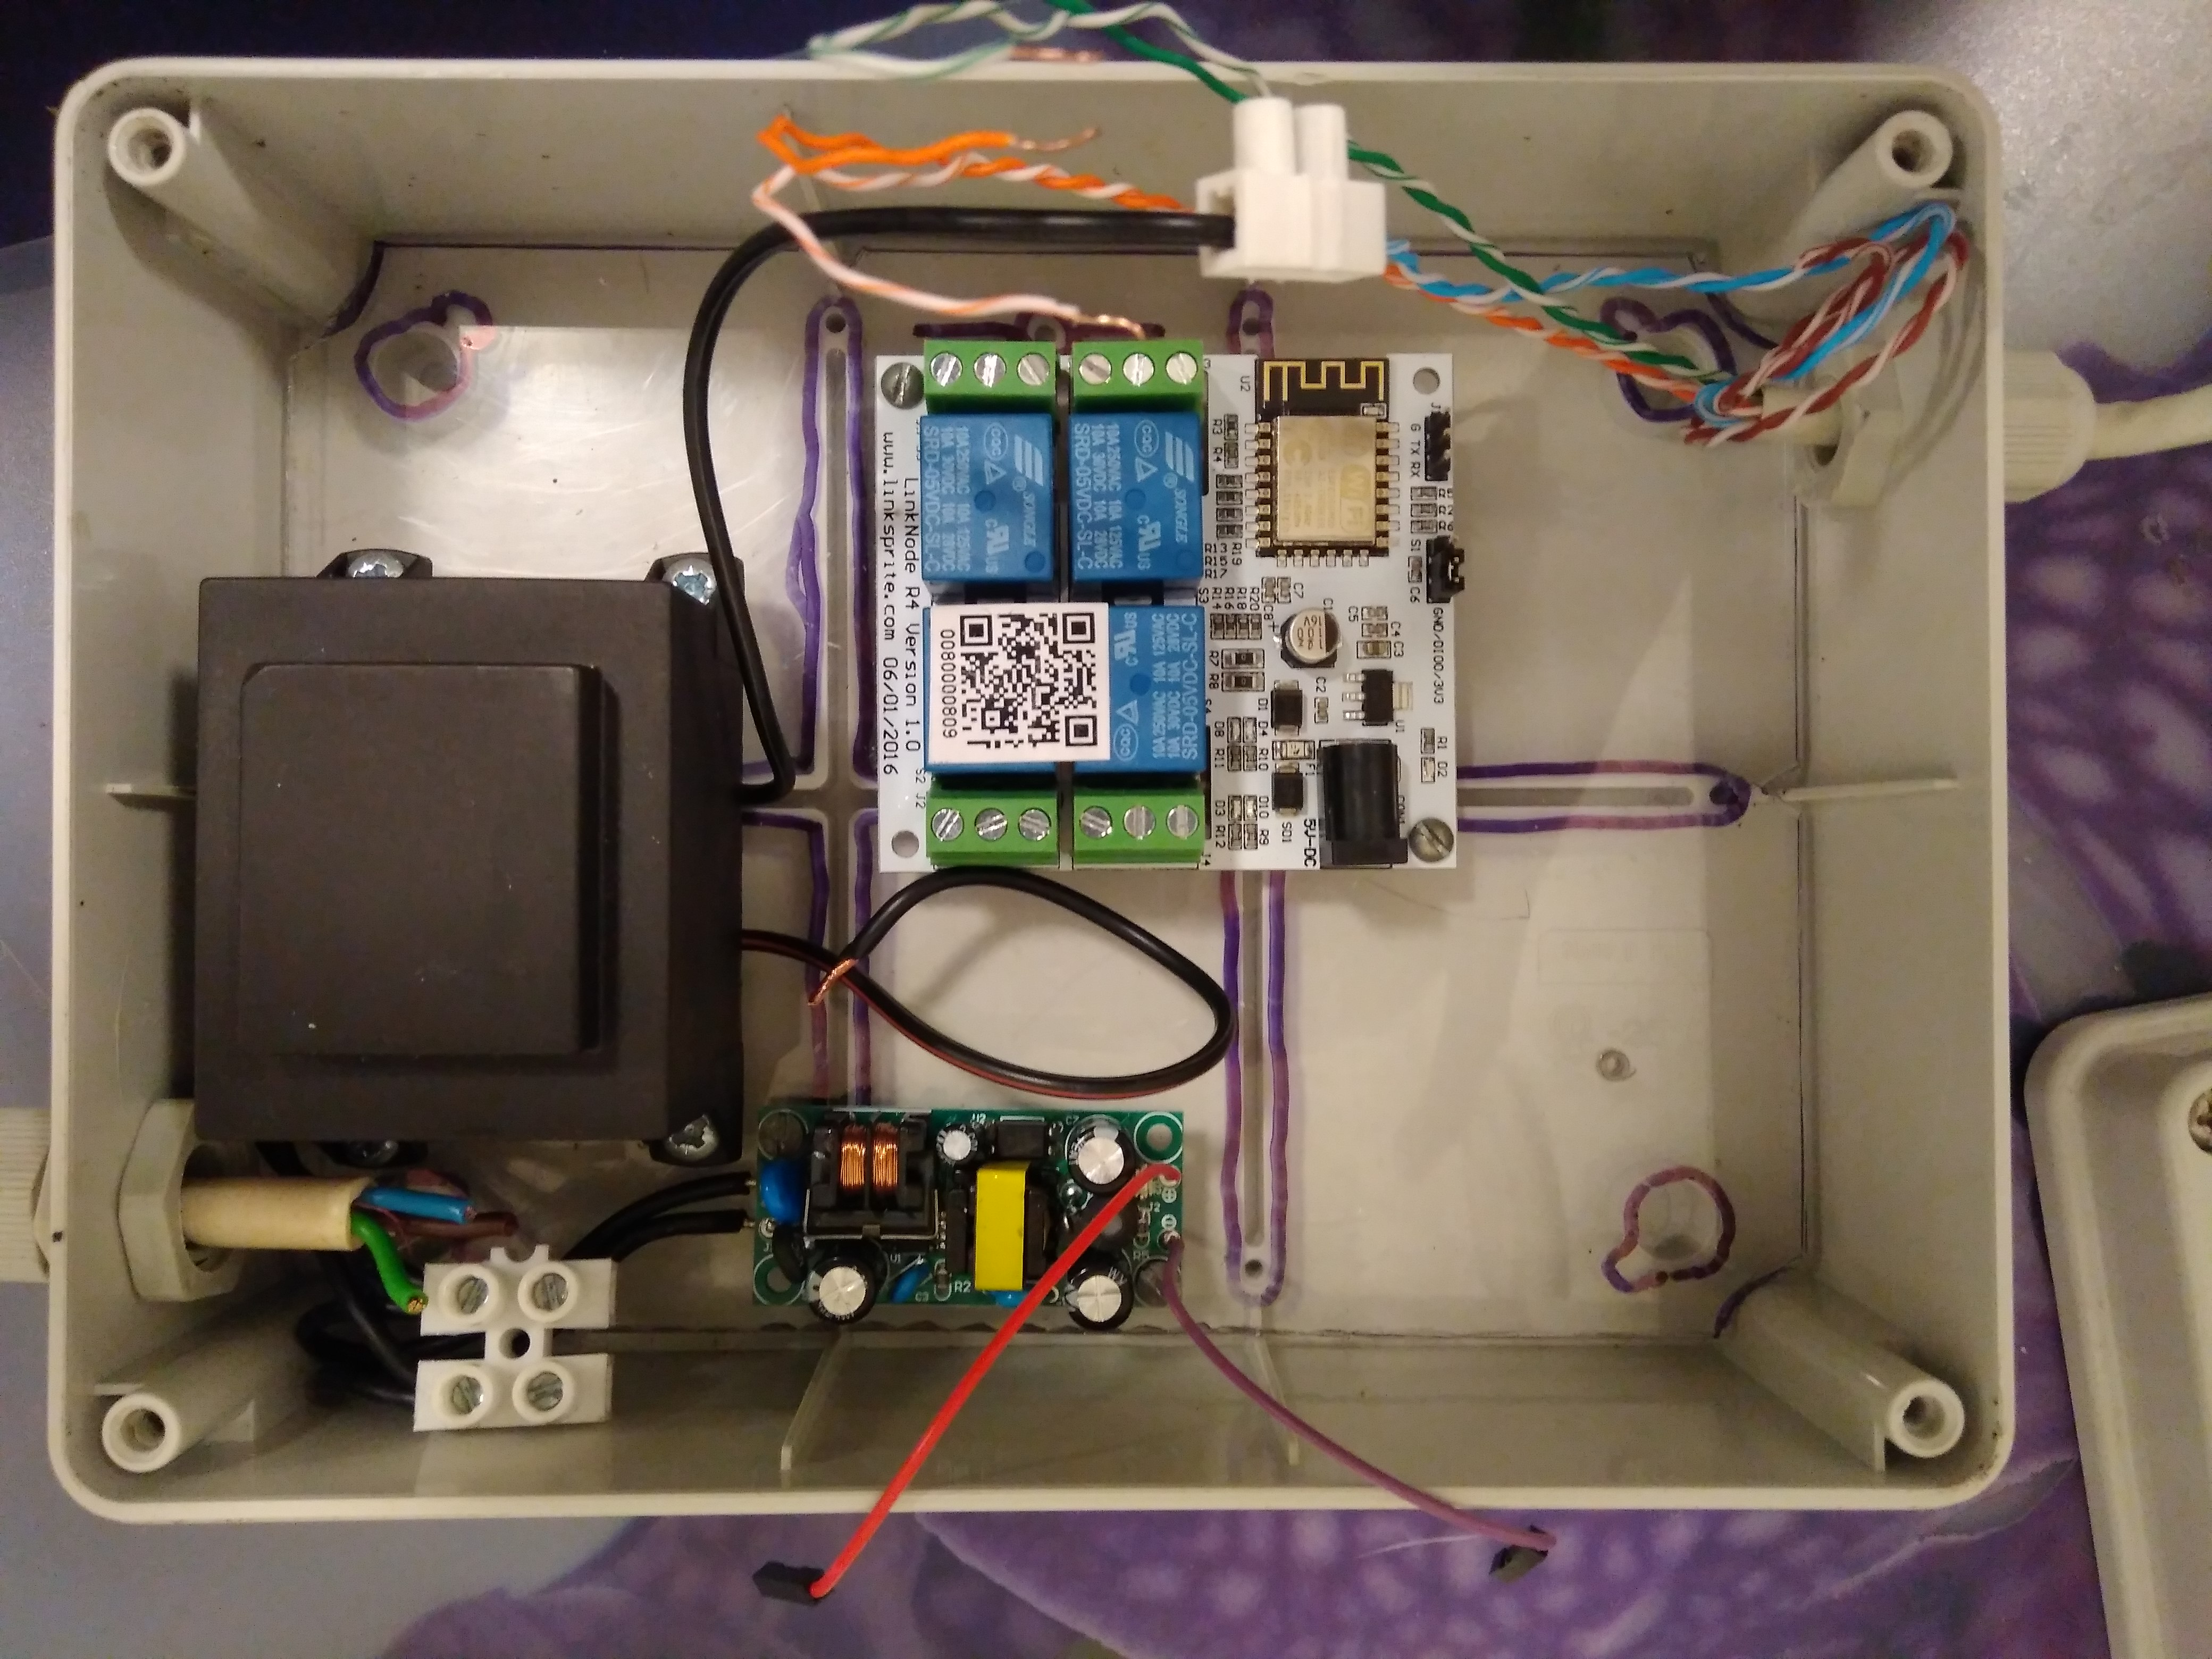
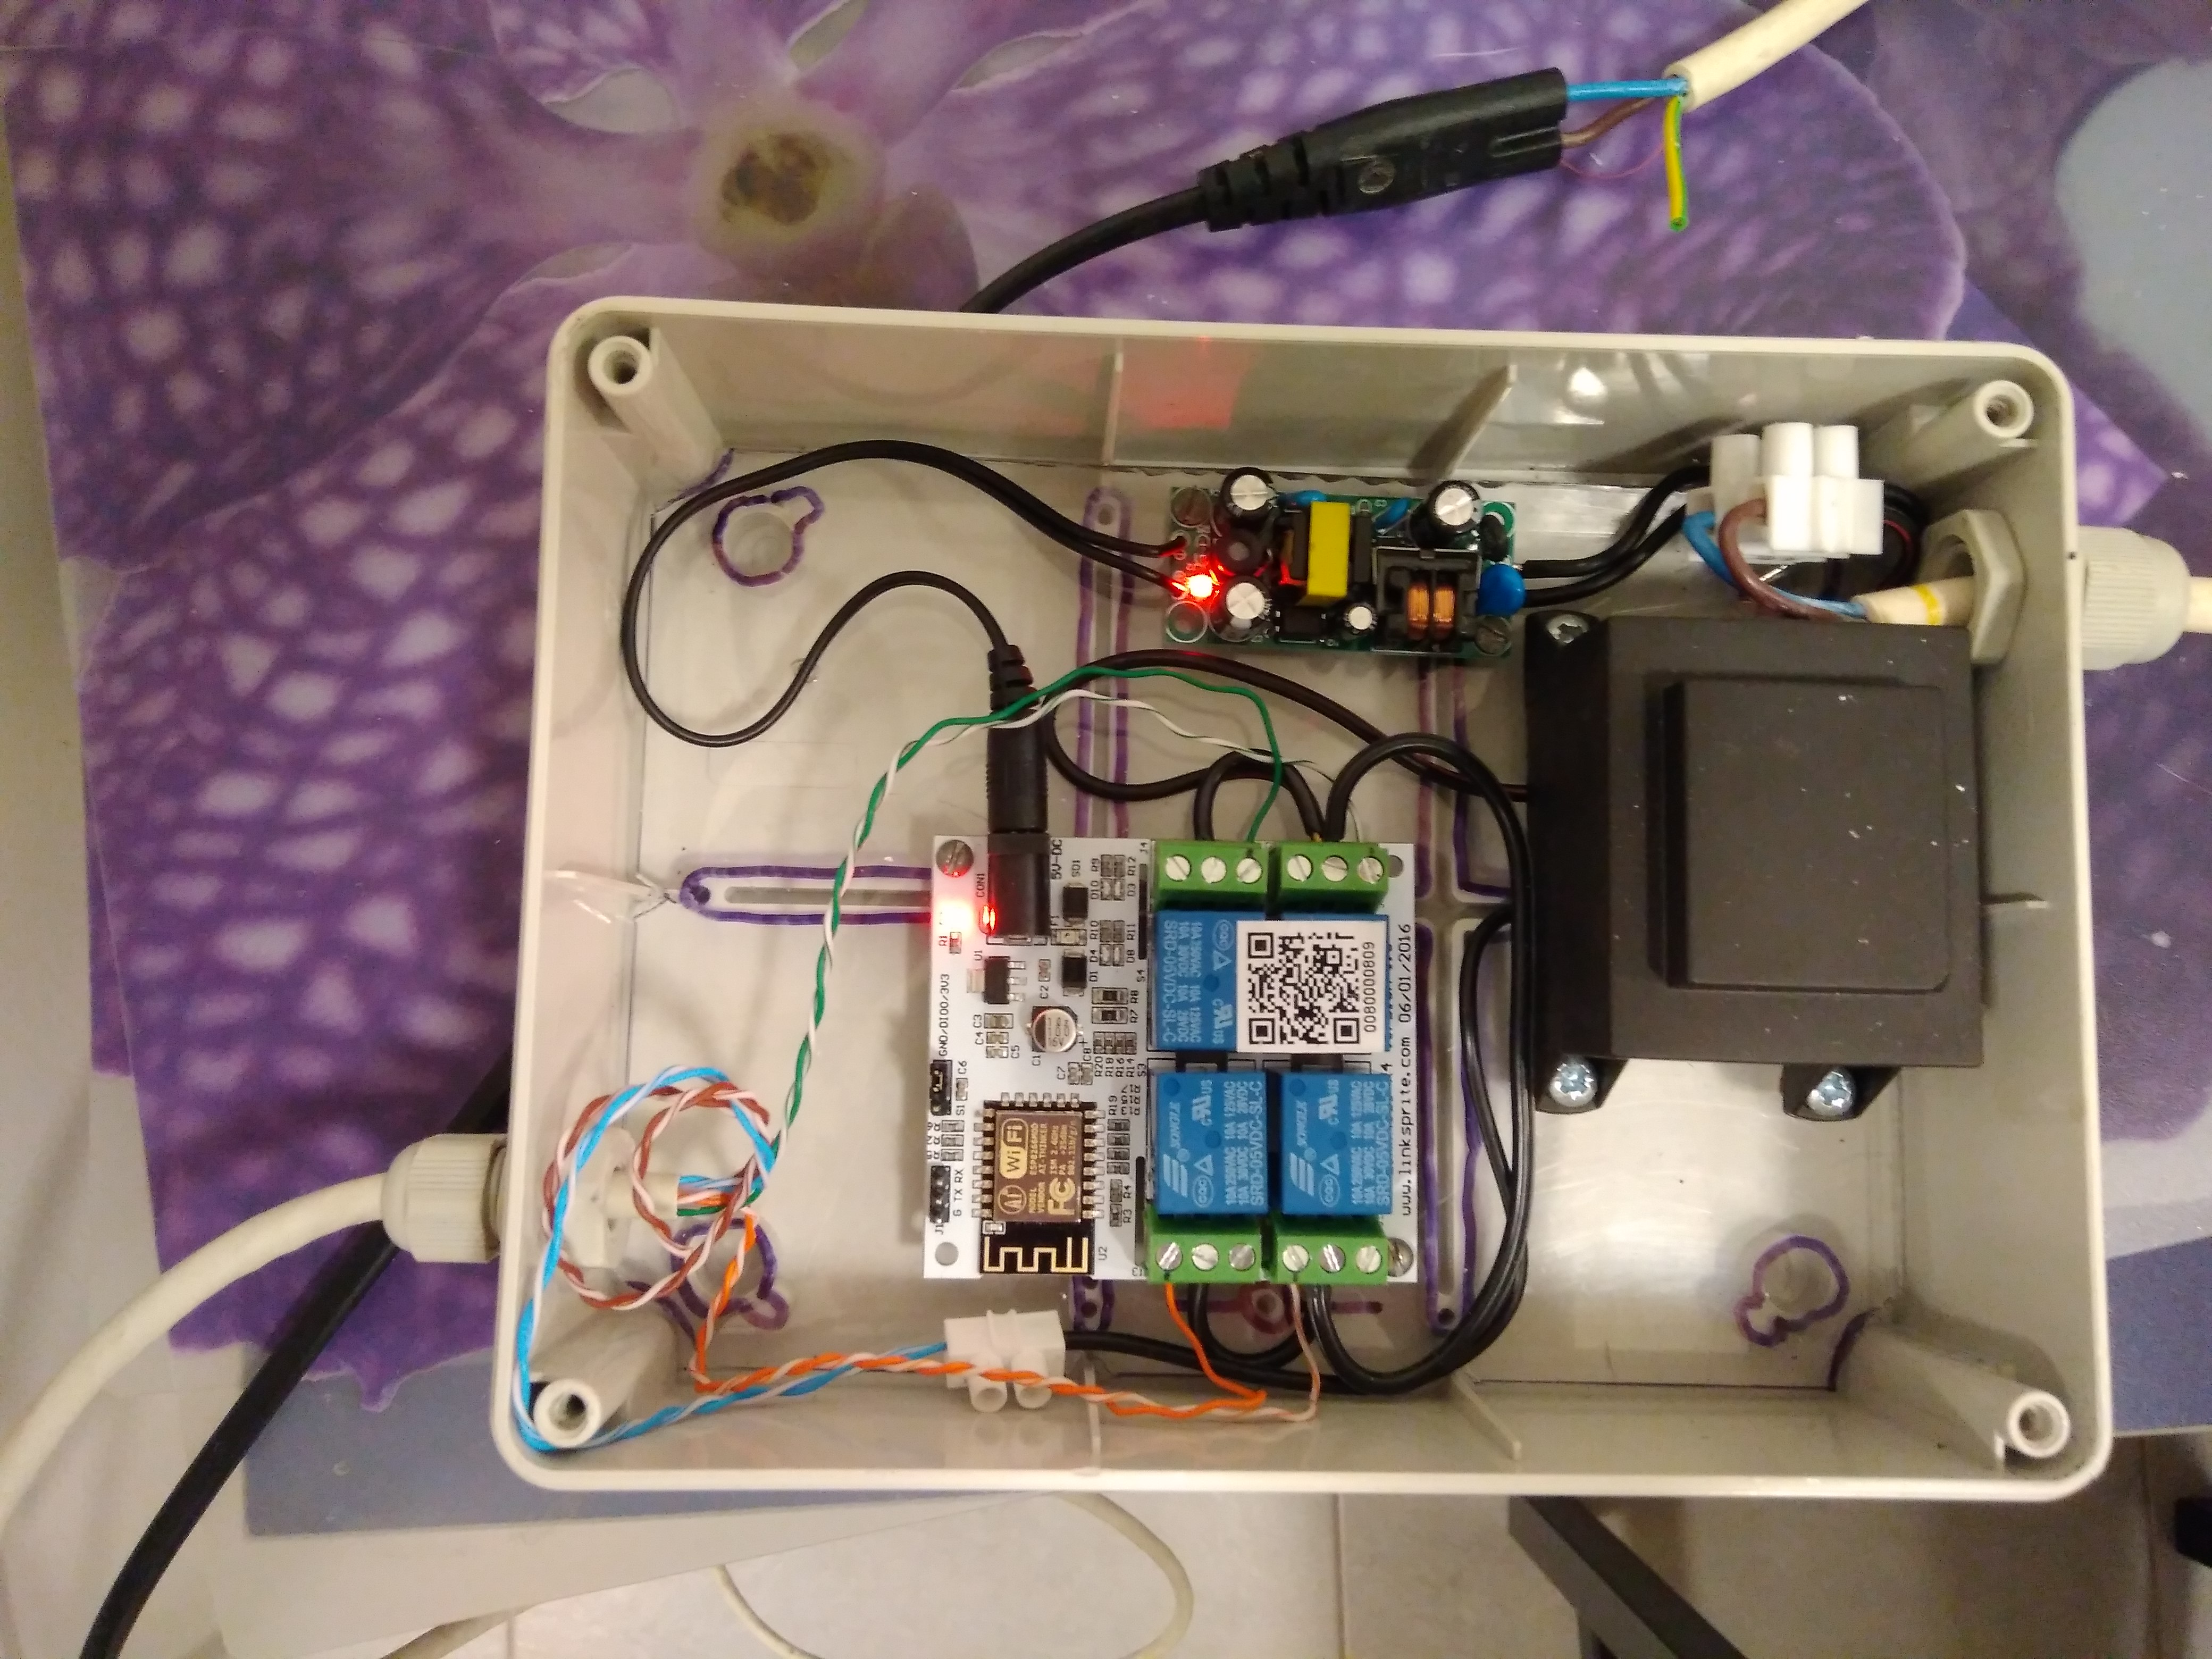
I tested everything on my desk and assembled the controller box:

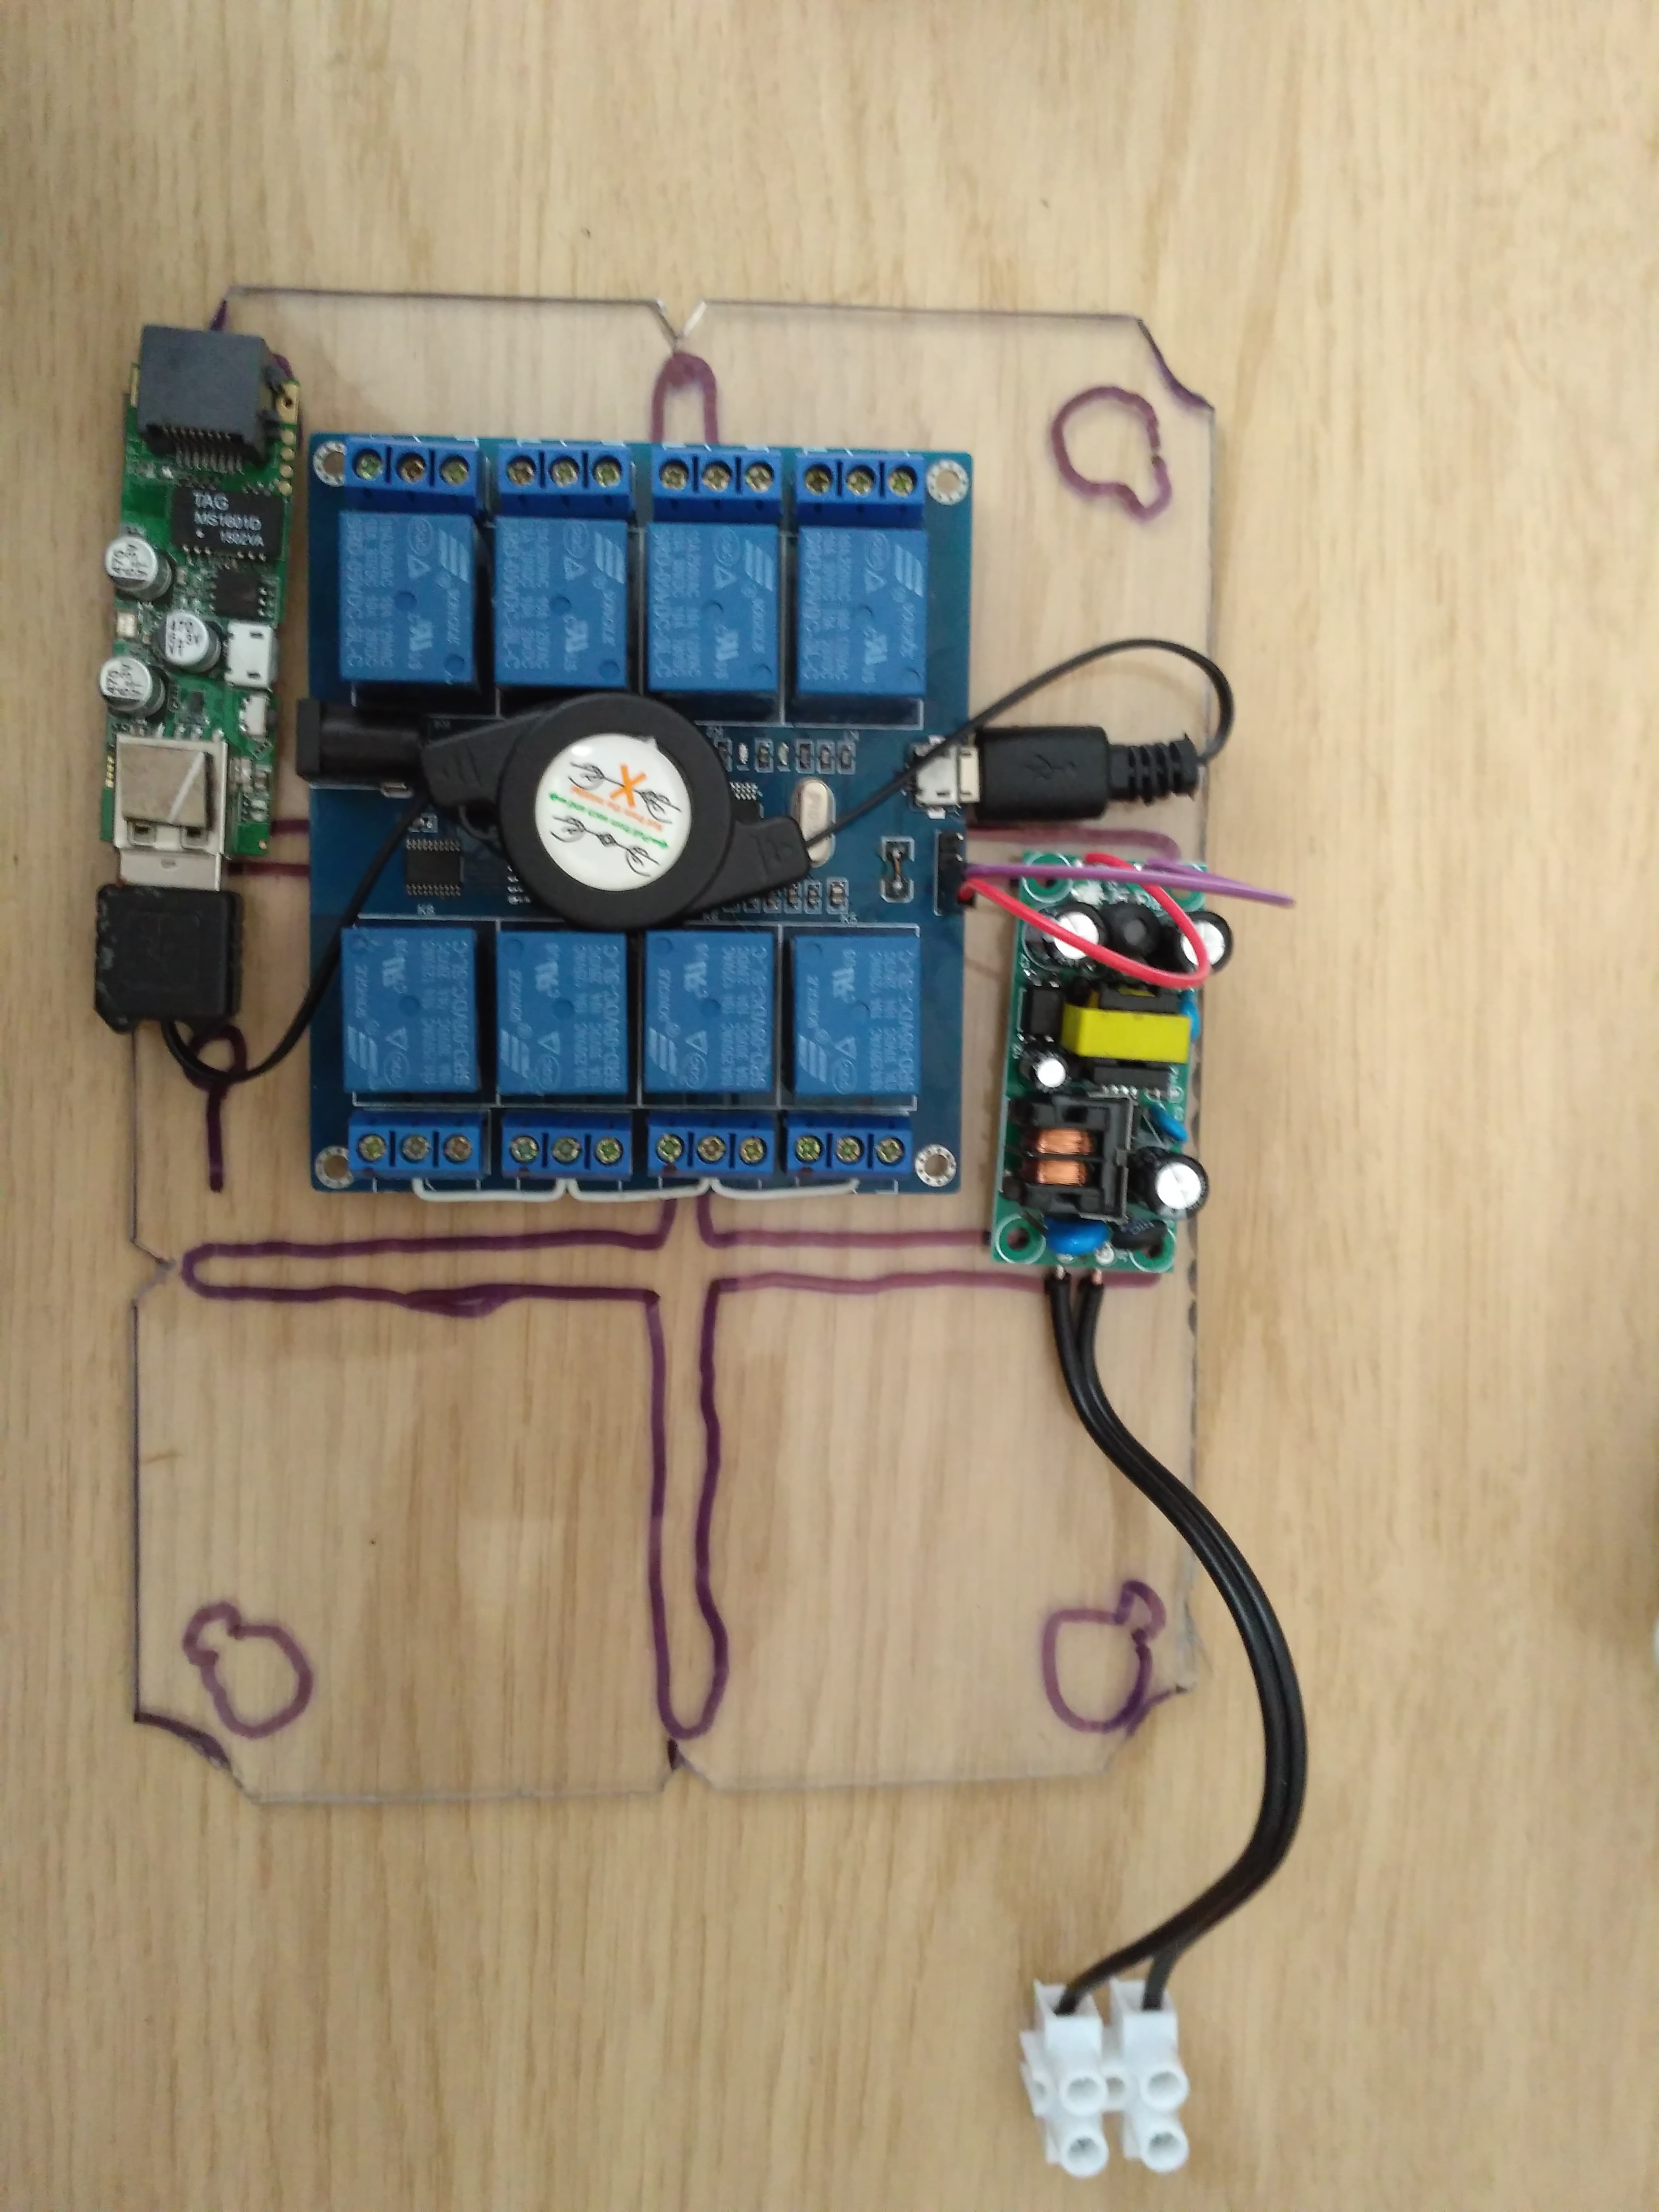
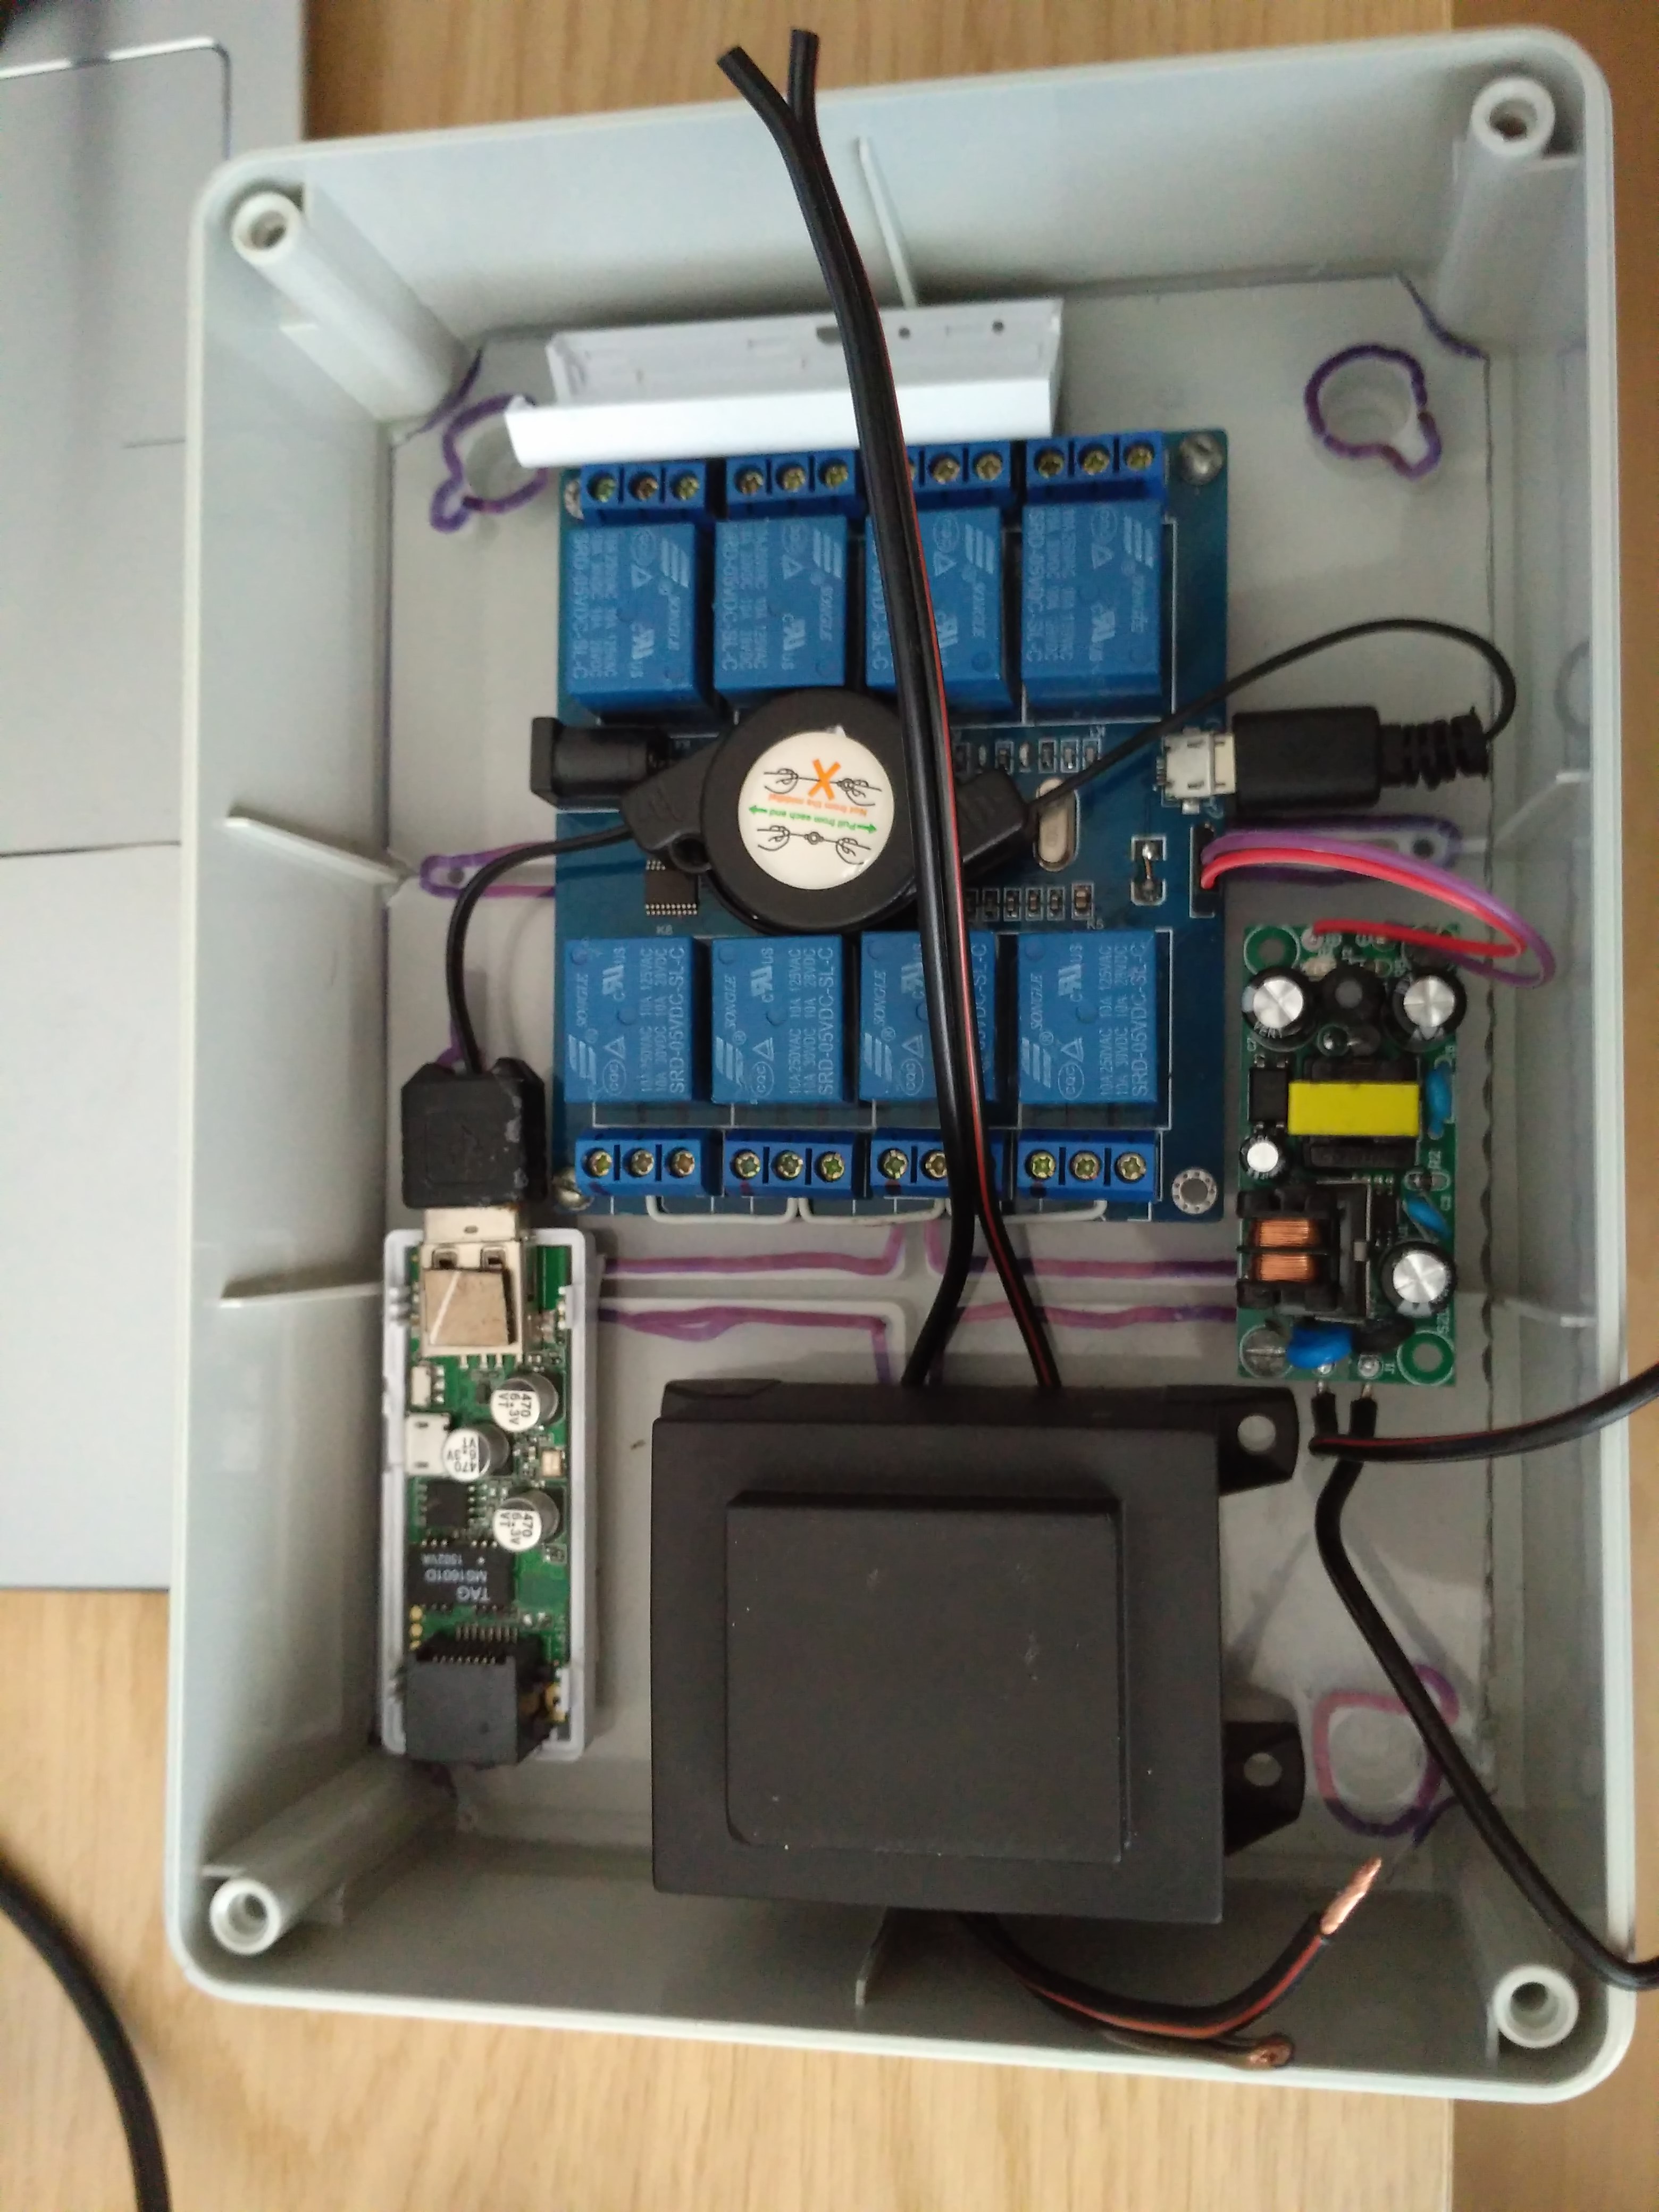
The box contained:
- 240V AC to 12V AC 50VA transformer to power solenoid valves
- 240V AC to 5V DC impulse power supply for router and relays
- USB relay board
- WiFi router
5V supply was connected to relay board and the router was backpowered via USB. This setup worked quite ok on my desk so I decided to mount it into valve box.
 This was a total disaster – I spent hours trying to make a good wifi connection but it showed up that the routers wifi module is very weak and simply cannot make it, so I decided to replace the router.
Relay controller – second try
The replacement I chose was ESP8266. It was a time when I started experimenting with it and I really liked its simple of use with NodeMCU. The USB relay has a serial TTL port so it was easy to connect. I wrote a program in LUA to connect to SIP and control the relay board via serial connection. Now the WiFi connection was stable enough but the relay still didn’t work right. The relay board contains a chip which communicates via serial and controls all relays. Its protocol is badly designed and buggy, suffers power surges and often requires a restart. I don’t recommend buying it to anyone. This was time to change the relay board.
Relay controller – final solution
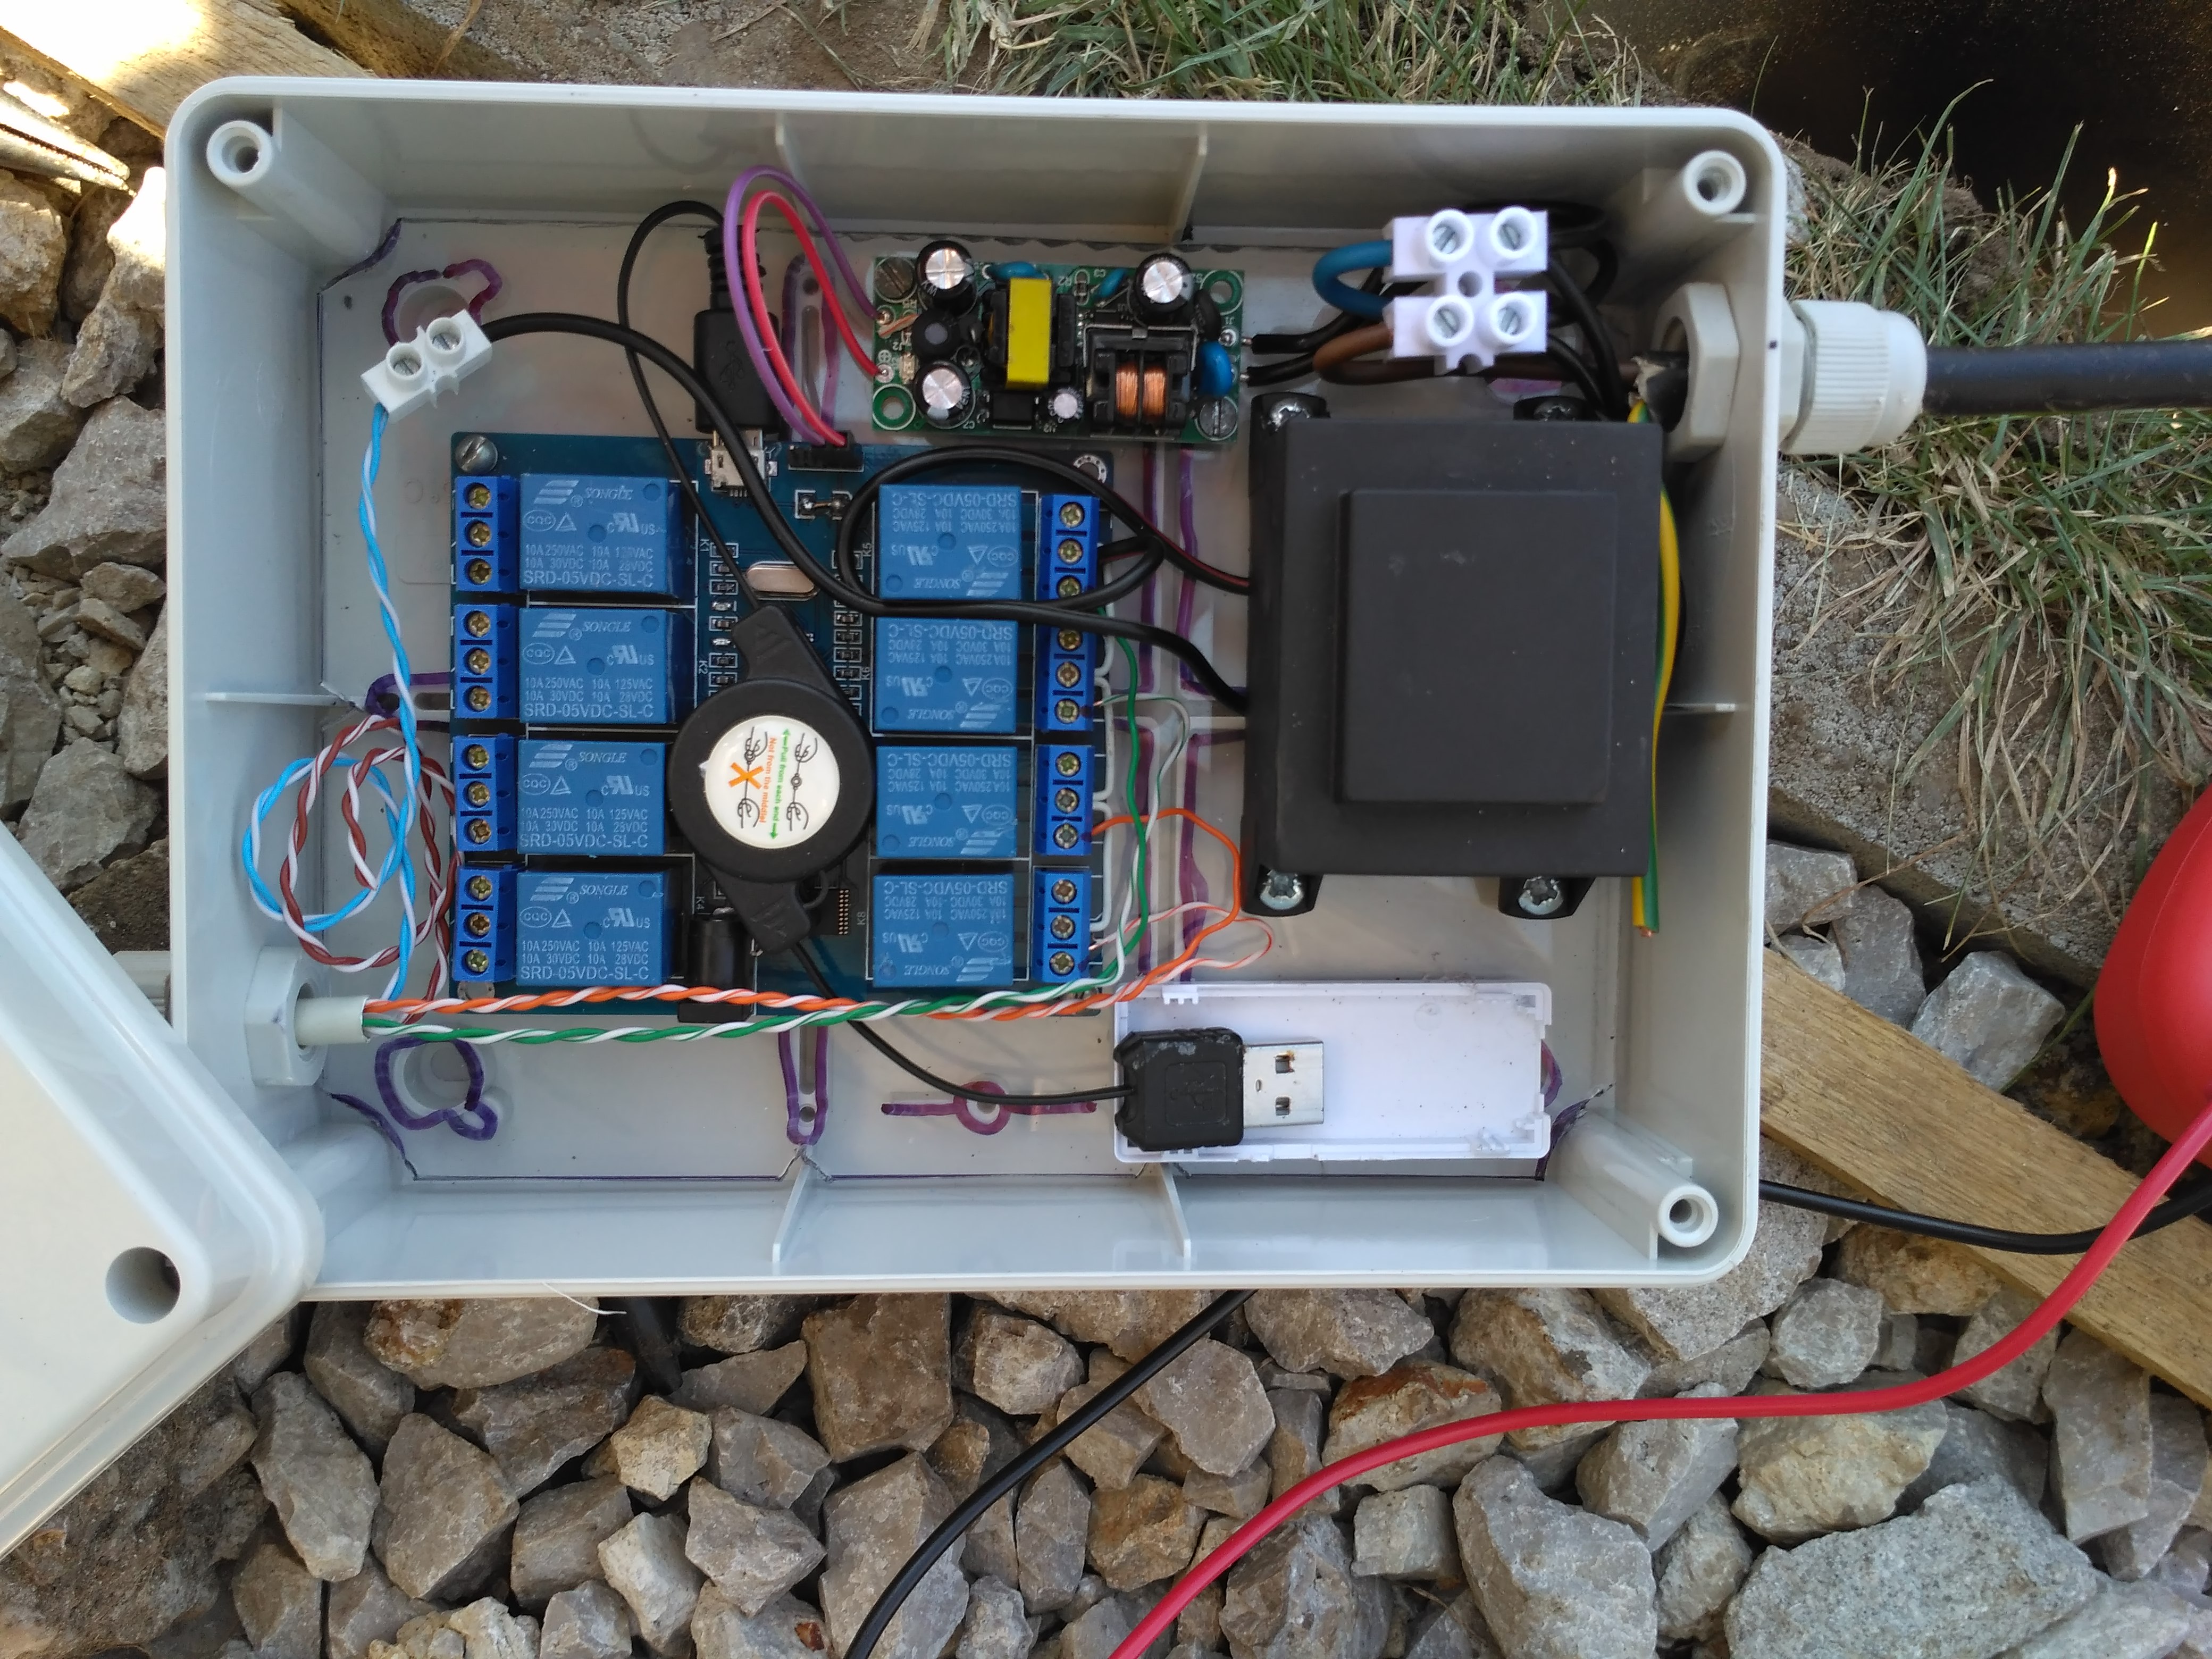
With all these experiences I decided to buy relay board with integrated ESP8266 – LinkNode R4 (shop, docs). Relays are controlled directly by ESP GPIO pins so there’s one less element to fail. Since I had most of the code prepared from “second try”, it was easy just to flash NodeMCU to onboard ESP, fix relay controll, upload my code and mount it into the box. I also decided to replace the power cable with flexible one and add junction box.
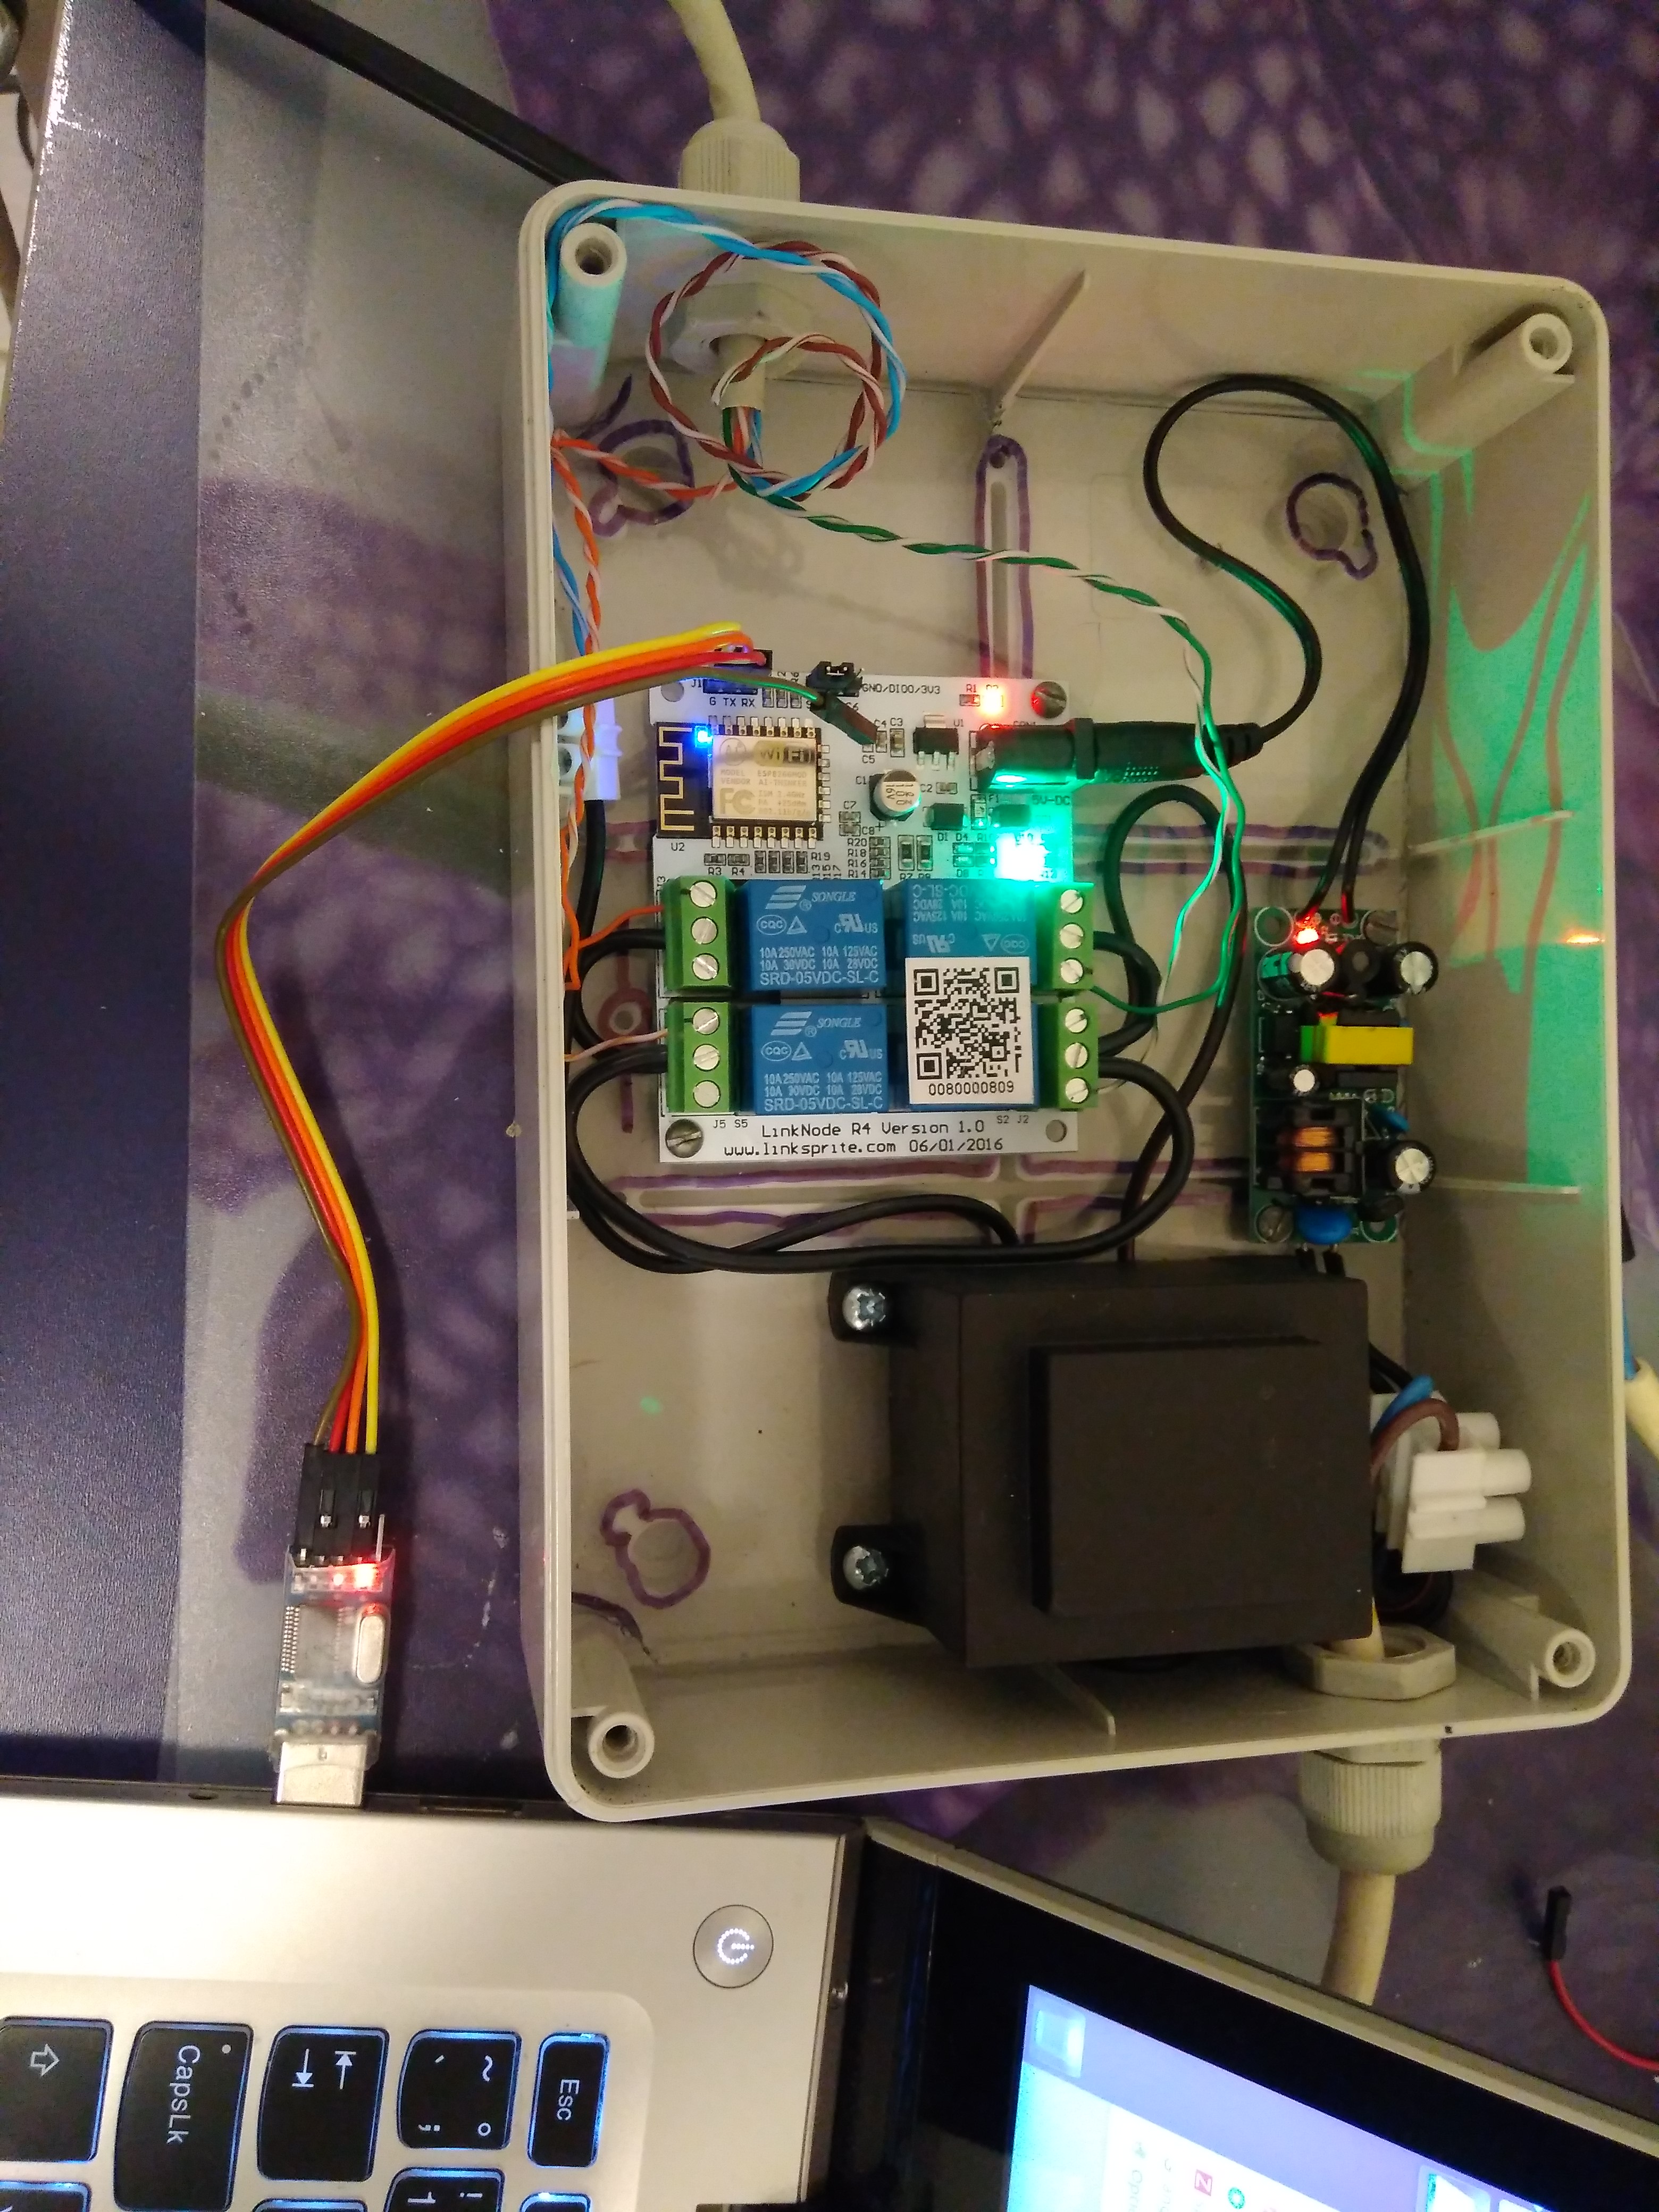
After mounting and powering on, everything worked like a charm!
 Hooray!!!!
Software
Relay board software
It uses NodeMCU image. After starting, it sets all relays open and waits for IP connectivity. After getting IP address it connects to defined server. It expects a new value from the server at least each 60 seconds, otherwise it considers the connection dead (there’s no better way detecting stale connection) and restarts.
init.lua:
-- Global Variables (Modify for your network)
ssid = "REMOVED"
pass = "REMOVED"


gpio.mode(0, gpio.OUTPUT)
gpio.mode(5, gpio.OUTPUT)
gpio.mode(6, gpio.OUTPUT)
gpio.mode(7, gpio.OUTPUT)
gpio.write(0, gpio.LOW)
gpio.write(5, gpio.LOW)
gpio.write(6, gpio.LOW)
gpio.write(7, gpio.LOW)

-- Configure Wireless Internet
print('\nAll About Circuits init.lua\n')
wifi.setmode(wifi.STATION)
print('set mode=STATION (mode='..wifi.getmode()..')\n')
print('MAC Address: ',wifi.sta.getmac())
print('Chip ID: ',node.chipid())
print('Heap Size: ',node.heap(),'\n')
-- wifi config start
wifi.sta.config(ssid,pass)
wifi.sta.autoconnect(1)
-- wifi config end

-- Run the main file
dofile("telnet.lua")
dofile("main.lua")
main.lua:
IP="SERVER_IP"
PORT=20000

function setValue(input)
 val = string.byte(input,1)
 print(val)
 if bit.isset(val,0) then
 gpio.write(6, gpio.HIGH)
 else
 gpio.write(6, gpio.LOW)
 end
 if bit.isset(val,1) then
 gpio.write(0, gpio.HIGH)
 else
 gpio.write(0, gpio.LOW)
 end
 if bit.isset(val,2) then
 gpio.write(5, gpio.HIGH)
 else
 gpio.write(5, gpio.LOW)
 end
 if bit.isset(val,3) then
 gpio.write(7, gpio.HIGH)
 else
 gpio.write(7, gpio.LOW)
 end
end

function startup()
 local conn = net.createConnection(net.TCP, 0)
 conn:on("sent", function(sck, c)
 end)

conn:on("connection", function(sck, c)
 print("Connected..")
 conn:send(wifi.sta.getip())
 end)

conn:on("receive", function(sck, c)
 mytimer:stop()
 mytimer:start()
 setValue(c)
 end)

conn:connect(PORT, IP)
end

tmr.alarm(1, 1000, 1, function()
 if wifi.sta.getip() == nil then
 print("IP unavaiable, Waiting...")
 else
 tmr.stop(1)
 print("Config done, IP is "..wifi.sta.getip())
 print("You have 5 seconds to abort startup")
 print("Waiting...")
 tmr.alarm(0, 5000, 0, startup)
 end
 end)

mytimer = tmr.create()
mytimer:register(60000, tmr.ALARM_SEMI,
function()
 node.restart()
end)
mytimer:start()
SIP plugin
As I mentioned before, SIP is very capable and it has event architecture for use with plugins. So my plugin just listens for TCP connections and sends events: after connection, it sends current relay status and adds the connection to pool. If there is an relay change event, it updates all connected clients with current status. Moreover, it sends current data each 25 second to satisfy restart timer on client side.
plugins/tcp_event.py:
# !/usr/bin/env python
# This plugin includes example functions that are triggered by events in sip.py

from blinker import signal
import gv

from socket import *
import threading

HOST = '0.0.0.0'
PORT = 20000

def get_byte():
 print gv.srvals # This shows the state of the zones.
 byte = 0
 for i in range(0, 8):
 byte = byte << 1
 byte += gv.srvals[7-i]
 print byte
 return ""+chr(byte)

class TcpServer(threading.Thread):
 def __init__(self):
 threading.Thread.__init__(self)
 ADDR = (HOST, PORT)
 serversock = socket(AF_INET, SOCK_STREAM)
 serversock.setsockopt(SOL_SOCKET, SO_REUSEADDR, 1)
 serversock.bind(ADDR)
 serversock.listen(5)
 self.serversock = serversock
 self.clients = []
 zones = signal('zone_change')
 zones.connect(self.notify_zone)
 self.notify_timer()

def run(self):
 while 1:
 print 'waiting for connection...'
 clientsock, addr = self.serversock.accept()
 print '...connected from:', addr
 clientsock.send(get_byte())
 self.clients.append(clientsock)

def notify_zone(self, name, **kw):
 self.notify()

def notify_timer(self):
 threading.Timer(25, self.notify_timer, ()).start()
 self.notify()

def notify(self):
 byte = get_byte()
 for clientsock in self.clients:
 try:
 clientsock.send(byte)
 except:
 print "removing stale connection"
 self.clients.remove(clientsock)
 #remove sock

thread1 = TcpServer()
thread1.start()
plugins/manifests/tcp_event.manifest:
Description: Sent byte to relay over TCP when triggered by event
Copyright 2017
Author: Daniel Kucera
Email: daniel.kucera@gmail.com
License: GNU GPL 3.0

Requirements: Python blinker module (included with software distro)

##### List all plugin files below preceded by a blank line [file_name.ext path] relative to OSPi directory #####

tcp_event.py plugins
tcp_event.manifest plugins/manifests
It was a very interesting journey and now I hope the system will work at least 10 times longer as it took me to build. 🙂
If you have any questions or ideas, I’ll be happy to see them in comments.
Bye!
Hey great work buddy. Can you help me with my SIP project. Help would be rewarded. Can you help me with full instructions to build my SIP using raspberry pi.
Cool project, I am also working on my own automated sprinkler system. I’ve having trouble finding good valves, which ones did you use?
Hi,
It is posible to use your code with NodeMCU and Relay Module?
It depends how you connect the relay but generaly speaking yes.
Thanks for the reply.
I’am newbie, i never touch NodeMCU.
Only playing with Raspberry Pi.
I will buy NodeMCU and i will try it, i hope i can do it.
Is there a reference or how to for this Springkler project?
Never mind my question, i have use this https://github.com/n0bel/ESPrinkler2
Thx
Hi
its now 2022 and I found your scripts.
init.lua mentions tenet.lua but you included no content for it.
Have you used a generic telnet.lua from elselwhere?
thanks in advance
Tony
Hi,
yes, I have.
This one: https://github.com/smartynov/nodemcu-modules/blob/master/telnet-server/telnet-server.lua
What other external modules do you reference in the scripts?
or what NodeMCU image version do you recommend?
I wouldn’t go with LUA now, I prefer Arduino with OTA.